We are reader supported. When you purchase through links on our site, we may earn an affiliate commission. Also, as an Amazon affiliate, we earn from qualifying purchases.
External canister filters are the workhorses of large aquariums. They move big volumes of water, hold a lot of media, and keep displays clear and stable. Done right, a canister can make a 100 to 300 gallon tank look effortless. Done wrong, it becomes noisy, weak, and hard to maintain. This guide compares canister types, key specs, and setup choices so you can pick the right system with confidence.
Introduction
Large tanks demand consistent filtration, predictable flow, and easy maintenance. A canister filter delivers all three if you size it well, pack it with the right media, and place it correctly. The challenge is that ratings on the box rarely match real performance. Hoses, head height, and media all reduce flow. Your stocking level and aquascape also change what you need.
This article breaks down how to evaluate canisters for tanks roughly 75 gallons and up, compares common design approaches, and shows how to build a reliable, quiet system that you can service in minutes instead of hours.
What Makes Canisters Ideal for Large Aquariums
High media volume
Canisters hold far more media than hang-on filters. That extra space supports robust biological filtration and layered mechanical polishing. Large aquariums need both.
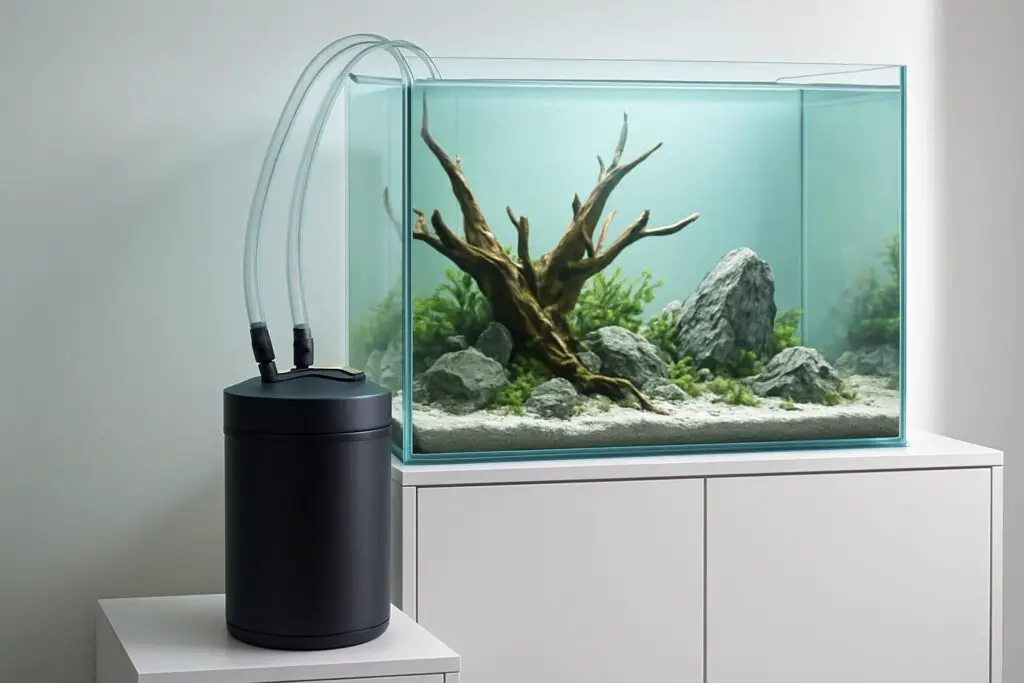
Pressure and placement
Canisters sit below the tank and push water through dense media. You get thorough contact time without hardware clutter inside the display. For big tanks with long runs of hose or inline gear, this pressure-based design is essential.
Flexible plumbing
With canisters you can add a pre-filter, inline heater, or UV clarifier without crowding the tank. You can also split returns, add spray bars, or direct flow behind rockwork to prevent detritus buildup.
How to Size a Canister for a Large Tank
Start with real turnover, not box ratings
As a baseline, aim for 5 to 8 times the display volume per hour as actual flow returning to the tank. Heavy stocking or messy feeders push you toward the higher end. Minimal stocking or a slow water column can run lower if biological media volume is high.
Box ratings are measured with no media and no head height. Real world flow is commonly 30 to 50 percent lower. To estimate, assume a 40 percent drop from the rated flow once the filter is filled with media and placed under the tank. If you need 800 gallons per hour of real flow, target a total rated flow around 1300 gallons per hour.
Media volume matters as much as flow
Flow keeps particles suspended and oxygenates the bacteria. Media volume houses that bacteria. For large tanks, pick canisters with deep baskets and structured biomedia. If in doubt, choose more media volume over a few extra points of box rated flow.
One big canister or two smaller ones
A single large unit is simple. Two mid sized canisters give redundancy and more even circulation. On long tanks, two intakes and two returns reduce dead zones and let you service one filter while the other runs.
Head height and plumbing losses
The vertical distance from the waterline to the filter head is head height. Longer hoses, tight bends, and narrow tubing add friction loss. Keep hoses as short and straight as possible and use the diameter recommended by the manufacturer. Avoid sharp 90 degree fittings and crushed hose runs.
Core Features That Differentiate Canisters
Pre filter modules
A pre filter is a coarse sponge that traps large debris before it clogs fine pads and biomedia. Some canisters have built in pre filters accessible from the top without opening the main body. This can turn a messy monthly teardown into a five minute rinse every week.
Priming systems
Manual priming bulbs, auto priming motors, or simple siphon priming through the intake all work. What matters is reliability. For large aquariums, a consistent priming system saves time and avoids dry starts that damage impellers.
Valves and quick disconnects
Double tap valves let you shut off and remove the canister without draining hoses. Full bore openings reduce flow loss. Well designed disconnects prevent drips and speed up service.
Basket design and flow path
Stacked baskets with true top down flow make it easy to layer media correctly. A clear path prevents bypass, where water skirts around clogged pads instead of passing through them.
Noise and vibration control
Rubber feet, solid lids, and balanced impellers reduce hum. A well packed canister placed on a level, cushioned surface should be near silent. Persistent rattles point to trapped air, a worn impeller, or a kinked hose.
Power consumption
Large canisters can draw from tens to over a hundred watts. Lower wattage with equal real flow means better efficiency. Daily cost is watts times hours divided by 1000 times your electricity rate.
Media Strategy for Big Tanks
Layer mechanical from coarse to fine
Start with coarse foam to catch leaves and food. Add medium pads to grab smaller particles. Finish with fine polishing pads if water clarity needs it. Rinse mechanical layers often to prevent channeling.
Biological media with high surface area and good flow
Use porous ceramic, sintered glass, or structured plastic. Avoid packing so tightly that water cannot move through. Oxygen rich, moderate speed flow supports stable biofilms that process ammonia and nitrite.
Chemical media as needed
Activated carbon and phosphate removers are optional tools. Use them to solve a problem, not as a permanent crutch. Replace chemical media on schedule to avoid release when exhausted.
Comparing Common Canister Approaches
High flow workhorses
These prioritize strong pumps and large baskets. They suit tanks with heavy bioloads, cichlids, or monster fish. Look for sturdy clamps, thick O rings, and easy to source impellers. Add a pre filter sponge on the intake if the canister lacks a built in one.
Pre filter focused designs
Brands with integrated pre filter modules shine for maintenance. You can rinse the pre filter weekly and leave biomedia undisturbed for months. This is helpful on planted tanks where you want steady bio and crystal water without frequent full teardowns.
Classic reliability first
Some designs keep it simple with quiet motors, proven seals, and straightforward baskets. They may lack extras like built in heaters or quick prime bulbs, but they run for years if serviced on time.
Budget options for large volume
Entry priced canisters can move enough water for big tanks but often ship with basic media and simpler valves. Upgrade the media, add double taps if missing, and check O rings regularly. With careful setup, a budget canister can serve as a second unit in a two filter plan.
Quiet and feature rich
Quiet lines focus on noise damping, smooth impellers, and sometimes integrated conveniences like heater ports. These are good for living spaces where silence matters and for tanks where temperature stability with inline heating is a plus.
Real World Setup for Large Aquariums
Intake and return placement
Place intakes near areas that accumulate debris, often the bottom rear corners. Put returns to sweep across the length of the tank and toward the intake. On long tanks, split returns or run two canisters on opposite ends.
Spray bar vs directional nozzle
Spray bars spread flow and reduce hot spots. They help planted and community tanks. Directional nozzles create strong jets to push waste from behind rocks. Choose based on aquascape and fish.
Hose routing
Cut hoses to the shortest practical length. Use gentle curves. Secure with proper clamps that do not bite into hose walls. Keep hoses accessible for cleaning so biofilm does not choke flow over time.
Inline gear considerations
Inline heaters free space in the tank and smooth temperature swings. UV clarifiers help with green water and some pathogens. Each added device increases head loss. When adding inline gear, upsize flow or reduce the number of elbows to compensate.
Maintenance That Keeps Flow Strong
Service interval
For heavily stocked large tanks, plan to clean mechanical stages every 2 to 4 weeks. If you use a pre filter, rinse it weekly. Biomedia can often go several months without disturbance if mechanical layers are doing their job.
Rinsing method
Rinse sponges and pads in dechlorinated water or tank water. Squeeze until water runs mostly clear. Do not scrub biomedia aggressively. Gentle swishing preserves beneficial bacteria.
Air purge and reseal
After reassembly, fill the canister fully and prime until there are no bubbles. Tilt the canister slightly while running to burp trapped air. Check the main O ring for debris and coat lightly with a silicone safe lubricant if recommended by the maker.
Impeller checks
Inspect the impeller and shaft for wear and slime. Clean the impeller well and replace parts that wobble or hum. A smooth impeller is the heart of a quiet filter.
Performance Tuning for Different Stocking and Aquascapes
Heavy cichlid or predator tanks
Prioritize turnover and coarse mechanical capacity. Consider two canisters or one canister plus a powerhead driven sponge for extra bio. Use a directional nozzle to keep the bottom clean.
Planted high CO2 tanks
Moderate, even flow prevents CO2 pockets and circulates nutrients. Use a spray bar along the back wall slightly angled up. Keep mechanical layers clean to maintain stable flow without strong jets.
Reef inspired or hardscape heavy freshwater
Detritus collects behind rocks. Aim returns to sweep behind structures. A second return or auxiliary circulation pump can prevent dead zones without overdriving the canister.
Community tanks with delicate fish
Use larger media volume with moderate velocity. Add flow directors to break up jets. If needed, tee off a portion of return flow back to the sump bucket during maintenance to tune down velocity while keeping filtration volume high.
Noise, Safety, and Reliability
Quiet operation checklist
- Level the canister on a firm, cushioned surface
- Eliminate trapped air by proper priming and gentle tilting
- Prevent hose vibration by securing with clips
- Clean the impeller and check for wear
Leak prevention
- Use a clean, undamaged main O ring
- Seat the lid evenly and engage clamps fully
- Avoid overtightening plastic fittings
- Test after service with towels under the unit for 15 minutes
Electrical safety
- Use a GFCI outlet and drip loops in all cords
- Unplug before servicing or moving valves
- Keep power strips off the floor and away from potential drips
When to Choose Two Canisters
Redundancy
If one unit fails, the other maintains aeration and biofilter. This is a strong argument on tanks housing valuable or sensitive fish.
Distribution
Two intakes and two returns reduce dead zones in long or tall tanks. You can also stagger maintenance so bio bacteria are never all disturbed at once.
Flexibility
Pack one filter for heavy mechanical and the other for bio and polishing. This lets you clean mechanical more often without opening the bio heavy unit.
Step by Step Setup Plan
1. Plan the flow
Decide intake and return locations based on your aquascape. On 6 foot tanks, plan for two return points. Choose spray bar or nozzle.
2. Cut and dry fit hoses
Route for shortest path with wide curves. Mark hose lengths, then cut square. Dry fit all parts to confirm reach and valve access.
3. Pack media correctly
Bottom to top or intake to output: coarse foam, medium pad, fine pad if needed, then biomedia. Do not over compress fine pads. Leave a small headspace if the design requires it for proper sealing.
4. Prime and inspect
Fill the canister body, close valves, and prime until hoses are full. Check every connection for drips. Start the motor and watch for microbubbles that clear in a few minutes.
5. Tune return direction
Adjust the return to move debris toward the intake and to create gentle surface ripple for gas exchange. Revisit after a day to fine tune once detritus patterns are visible.
Energy and Operating Cost
Match flow to watts
For large aquariums, favor canisters that provide strong real flow at moderate wattage. Over time, this saves money and reduces heat input. Clean mechanical stages often to keep watt draw efficient.
Continuous duty mindset
Canisters run 24 hours a day. Stable, low noise, and low wattage pay off. Set reminders for pre filter and pad rinsing so the unit never labors against clogged media.
Troubleshooting Common Issues
Reduced flow
- Rinse mechanical media and clean hoses of biofilm
- Check for kinks, tight bends, or clogged pre filters
- Inspect impeller well for slime and wear
- Purge trapped air
Microbubbles or rattling
- Reprime until all air is expelled
- Ensure intake is not drawing air from near the surface
- Replace worn impeller parts if noise persists
Leaking after service
- Clean and reseat the main O ring
- Remove grit from the sealing surface
- Engage all clamps evenly without forcing
Model Shortlist by Use Case
For heavy bioloads
Pick a high flow, large basket canister. Add a coarse intake sponge and consider a second unit or an auxiliary pump for circulation.
For plants and clarity
Choose a canister with an easy pre filter. Use a spray bar and fine polishing pad as needed. Keep chemical media minimal and fresh.
For quiet living rooms
Favor models with damped motors and solid housings. Place the filter on a vibration pad and keep hoses clean for smooth flow.
Putting It All Together
Example planning process
Tank size and stock first. Set a target real turnover of 5 to 8 times per hour. Estimate a 40 percent loss from ratings to pick total rated flow. Decide on one large canister or two smaller ones based on tank length and redundancy needs. Prioritize media volume and easy maintenance features like pre filters and double taps. Place intakes and returns to drive debris toward collection points. Keep hoses short and smooth. Rinse mechanical media often and leave biomedia mostly undisturbed. Recheck flow and noise monthly and refresh worn impeller parts before they fail.
Conclusion
Large aquariums reward careful canister selection. Real world flow, media volume, and easy maintenance matter more than box numbers. Match your filter plan to your stock and aquascape. Use smart plumbing and a pre filter to keep maintenance quick. Choose one strong canister for simplicity or two for redundancy and even circulation. With these steps, your big tank will run clear, quiet, and stable for the long term.
FAQ
Q: How do I size a canister filter for a 125 gallon tank
A: Aim for 5 to 8 times real turnover per hour and assume around 40 percent flow loss from box ratings. Calculate the real flow you want, then choose total rated flow that covers that loss. Prioritize media volume as much as flow.
Q: Should I run one large canister or two smaller ones
A: One large unit is simple. Two mid sized canisters add redundancy, improve circulation on long tanks, and let you service one while the other runs. Choose based on tank length, stocking, and your maintenance preference.
Q: How often should I clean a canister on a heavily stocked tank
A: Rinse mechanical stages every 2 to 4 weeks and a pre filter weekly if you have one. Leave biomedia mostly undisturbed for several months as long as mechanical layers are doing their job.
Q: How do I reduce flow for delicate fish without harming filtration
A: Use larger media volume with moderate velocity, swap to a spray bar for gentler distribution, and direct returns to break up jets. Keep filtration volume high and tune velocity with hardware placement rather than starving the filter.
Q: Are pre filters worth it on large aquariums
A: Yes. A pre filter traps large debris before it clogs fine pads and biomedia, turning a messy monthly teardown into a fast weekly rinse and keeping core media stable.