We are reader supported. When you purchase through links on our site, we may earn an affiliate commission. Also, as an Amazon affiliate, we earn from qualifying purchases.
Choosing the right pond liner size prevents leaks, wrinkles, wasted money, and construction delays. The good news is that you can calculate the liner size with one clear formula. This guide breaks the process into simple steps, explains where people go wrong, and shows real examples so you can buy once and build with confidence.
Introduction
A pond liner must be big enough to cover the floor, climb the deepest walls, and wrap securely over the edge. If it is too small, you will fight exposed soil, capillary leaks, or a waterline that never stabilizes. If it is too large, you waste budget and struggle with bulky folds. The goal is a liner that fits correctly the first time.
Here you will learn an easy formula for any pond shape, how to measure depth and overlap accurately, how to account for shelves and slopes, how to handle irregular ponds, and how to round up to a liner size that suppliers actually stock. Follow each section in order and you will have a cut-and-dry answer by the end.
The Easy Formula
Use this formula for almost every flexible liner project:
Liner length = Max pond length + 2 x Max depth + 2 x Edge overlap
Liner width = Max pond width + 2 x Max depth + 2 x Edge overlap
Max pond length and width are the longest measurements across the shape. Max depth is the deepest vertical distance from the final waterline to the deepest point. Edge overlap is the liner you want above the waterline to secure under rocks, pavers, or edging.
Define Each Measurement Clearly
Max pond length and width
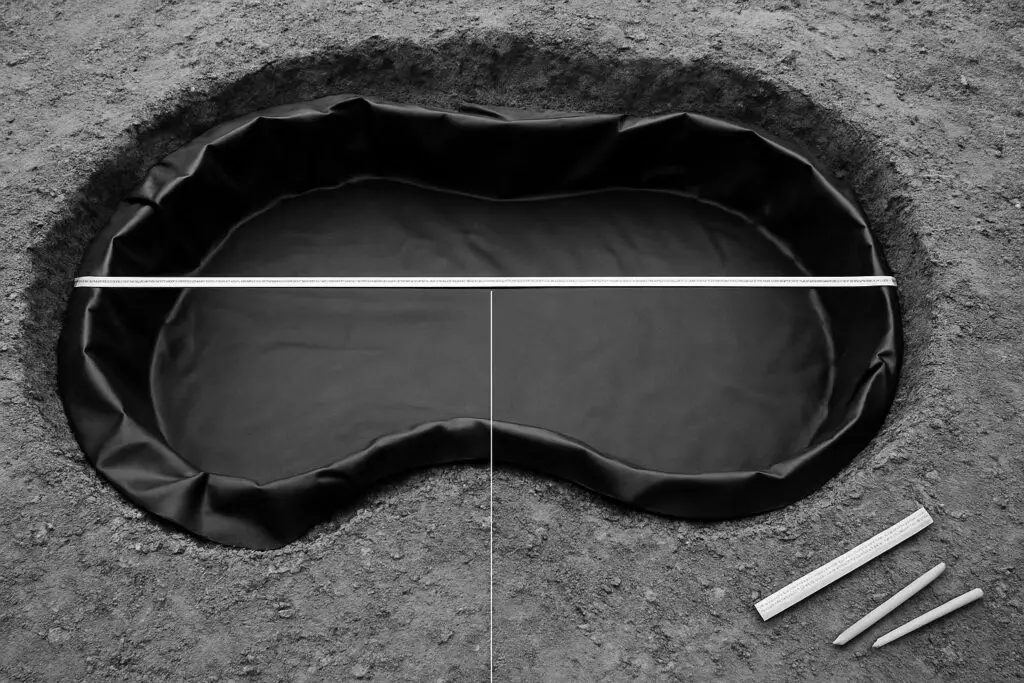
Measure the absolute longest points across the pond cavity. If the pond is irregular or kidney shaped, stretch a string across the longest axis, pull tight, and measure the straight distance for length. Do the same for the widest axis for width. Do not trace curves with the tape for these numbers. Use straight, maximum spans.
Max depth
Measure from the final waterline down to the deepest point of the excavation. If you have shelves, still use the deepest point. If you plan a freeboard margin above the waterline for safety, include that in the depth because the liner must climb to that elevation. Use vertical depth, not the sloped measurement along an angled wall.
Edge overlap
This is liner that extends past the waterline to lock under edging and to protect against splashes, rain runoff, and capillary wicking. For most ponds, allow 30 to 45 cm per side or 12 to 18 inches per side. If you are building wide coping, a raised edge, or expect heavy rainfall, allow more. You need enough material to fold under edging stones and still pinch the liner securely.
Why This Formula Works
The liner must cross the pond length, go down one wall, across the deepest floor, and up the opposite wall. That is why depth is doubled. The same logic applies to width. The edge overlap on both sides is also doubled because liner wraps over opposite edges. By always using the maximum values for length, width, and depth, you cover all shelves, coves, and curves without running short at any point.
Common Measurement Mistakes
Using water depth instead of excavation depth
Builders sometimes measure only to the planned waterline and forget that liner needs to climb higher for the edge build. Include freeboard and any raised edge height within the depth figure.
Ignoring shelves and plant terraces
Shelves do not change the depth number directly, but they affect the need for overlap and smooth transitions. Always use the deepest point for depth and ensure the overlap is still adequate above the highest shelf near the perimeter.
Measuring sloped sides on the angle
Depth must be vertical. An angled tape reading will be longer than the true vertical and can cause you to overspend. Use a level or a straight board with a tape dropping vertically to the bottom to get an accurate depth.
Forgetting the final edge thickness
If you are placing thick capstones, stacked boulders, or a mortar bed above grade, the liner must reach that height. Add this rise into the depth calculation or increase the edge overlap.
Choose the Right Edge Overlap
Edge overlap depends on how you will secure and hide the liner.
If using loose rock coping that lightly pins the liner, allow at least 30 to 45 cm per side so you can fold and trap it behind stones without tension. If using pavers on a compacted base, consider 45 to 60 cm per side, especially if the edge is raised. If you plan a planted bog or wetland shelf at the perimeter, allow extra overlap to reach into the bog basin and still return up for a capillary break.
When in doubt, add more overlap. Excess overlap can be trimmed or folded. A short liner cannot be stretched to fit.
Underlayment Size
Underlayment protects the liner from punctures and improves durability. Size it the same as your liner for a beginner friendly approach. Matching sizes keeps installation simple and ensures the edge and capillary break sit on cushioning, which reduces the chance of hidden pressure points under rock edging.
Irregular and Kidney Shapes
Use the same formula. Irregular ponds are measured with a bounding box approach. Find the single longest span for length and the single widest span for width. Use the deepest vertical point. Then add the same edge overlap on both dimensions. This ensures the liner can drape into all curves and pockets.
For highly eccentric shapes with deep coves, you may have more excess liner in certain corners. Plan your folds at wide, gentle curves and away from tight planting pockets to keep the look clean.
Shelves, Steps, and Terraces
Terraces do not change how you compute liner size. Compute depth from the final waterline to the deepest point. The liner will follow the contour across shelves without issue. What shelves do affect is placement of folds and the need for secure edge clamping above the highest shelf near the perimeter. After calculation, dry fit the liner and place any necessary pleats where shelves are widest. Avoid cutting the liner to fit shelves unless you are heat seaming with proper tools and materials.
Streams and Waterfalls
Size stream and waterfall liners separately from the main pond. Use the same approach. For a straight run, measure the maximum stream length and the maximum width of the channel. Use the deepest vertical channel depth and add edge overlap to both sides. Formula approach is identical. If the stream twists, still use the longest straight string distance between the highest spill and the pond connection as length. The liner needs enough width to climb both sidewalls and still fold under edge rocks.
Formal and Vertical Wall Ponds
Formal ponds with vertical walls can still use the formula. Measure internal length and width, use the vertical depth to the top of the finished edge, and add generous overlap. Many builders select a box welded liner to reduce folds in sharp corners. If you go that route, suppliers will still ask for internal length, width, and depth, plus how much top flange or overlap you want. The formula gives you a check to ensure the flat sheet used to fabricate the box welded liner is large enough.
Material and Thickness Choices
The formula works for EPDM, RPE reinforced polyethylene, and PVC. The most common hobby choice is EPDM around 1.0 to 1.2 mm thickness or about 40 to 45 mil. Thicker liners resist puncture better but weigh more and can be harder to handle. RPE is lighter for a given strength and can reduce weight on large projects. The sizing method does not change with material, but handling and fold placement do. Plan more hands on deck for heavy liners and avoid dragging the liner across sharp surfaces.
Step by Step Measuring Walkthrough
Mark the pond outline with a rope or hose. Adjust until the footprint feels right. Dig the pond, including shelves and the deepest point. Compact the floor and shape clean curves. With a level, mark the final waterline around the perimeter. Decide any raised edge height or capstone thickness you will use. Measure the maximum straight length across the pond. Measure the maximum straight width across the pond. Measure the vertical depth from the final waterline down to the deepest point. Choose your edge overlap per side, usually 30 to 45 cm or 12 to 18 inches. Plug into the formula for length and width. Round up to the nearest stock liner size your supplier carries. Match your underlayment size to the liner size.
Worked Example 1 Metric
Suppose your pond is 3.0 m long at its longest point and 2.0 m wide at its widest point. The deepest point is 0.9 m below the final waterline. You want 0.3 m of edge overlap on each side.
Liner length = 3.0 + 2 x 0.9 + 2 x 0.3
Liner length = 3.0 + 1.8 + 0.6 = 5.4 m
Liner width = 2.0 + 2 x 0.9 + 2 x 0.3
Liner width = 2.0 + 1.8 + 0.6 = 4.4 m
Order a liner at least 5.4 m by 4.4 m. Round up to the next available size if your supplier sells in fixed increments.
Worked Example 2 Imperial Irregular
Consider a kidney shaped pond with a longest span of 14 ft and a widest span of 10 ft. The deepest point is 3.5 ft below the waterline. You want 1.0 ft of edge overlap per side.
Liner length = 14 + 2 x 3.5 + 2 x 1.0
Liner length = 14 + 7 + 2 = 23 ft
Liner width = 10 + 2 x 3.5 + 2 x 1.0
Liner width = 10 + 7 + 2 = 19 ft
Order a liner at least 23 ft by 19 ft. Choose the next standard stock size up if needed.
Choosing Standard Stock Sizes
Suppliers often stock liners in set widths and cut lengths from a roll. Widths commonly step in increments such as 10, 15, 20, 25, or 30 ft, and lengths are cut to order. In metric markets, widths may step in 0.5 m or 1.0 m increments. After you compute exact dimensions, round up to the next available width and length. Always round up, never down.
Planning Folds and Corners
Every flexible liner install will have some folds. Plan them where the pond is widest or in gentle curves. Avoid placing large pleats on narrow shelves where plants need clean space. Never cut a fold off unless you are equipped and trained to seam liners correctly. A wrong cut is a permanent leak risk.
Accounting for Temperature and Handling
EPDM and RPE have small changes in flexibility with temperature. In warm sun, liners drape more easily and settle cleanly into contours. If you install on a cold day, allow extra time to work folds and avoid tension. The sizing formula does not change with temperature, but warm, flexible liner material makes a clean fit easier.
Underlayment Installation Tips
Lay underlayment over the entire excavation before the liner. Overlap pieces by at least 10 to 15 cm wherever you need a joint. Match the underlayment size to the liner so the edges are cushioned. Remove sharp stones and roots first, then set underlayment, then set the liner. Do not skip underlayment on shelves or edges.
Streams, Bog Returns, and Skimmer Mouths
When a stream or bog returns water to the pond, make sure the higher feature overlaps above the main pond liner. Extend the upper liner to lap over the lower liner by a generous margin at the connection. For sizing, treat each water feature as its own calculation using the same formula for its maximum length, width, and depth, plus edge overlap. This avoids shortfalls where features meet.
When to Consider a Custom or Box Welded Liner
Very deep formal ponds with sharp, square corners may benefit from a box welded liner. These are fabricated from flat sheets into a three dimensional shape. You still use the same internal length, width, depth, and edge overlap to define a safe flat sheet size for fabrication. Box welded liners reduce large corner folds and make vertical walls look crisp.
Quick Checklist Before You Order
Confirm final waterline height around the edge. Measure max length and width as straight spans. Measure the deepest vertical depth including any raised edge or freeboard. Choose an overlap per side of 30 to 45 cm or 12 to 18 inches. Calculate liner length and width with the formula. Round up to a stock size. Match underlayment size to liner size. Plan fold placement to keep shelves tidy.
Troubleshooting After Delivery
If the liner seems short in one direction, re check whether your actual excavation now has a deeper spot than planned. Small shortfalls can be solved by slightly lowering the waterline or revising the edge detail to reduce how much overlap is hidden under stones. If the liner is very oversized, place folds in wide areas and trim only at the very end after the pond is full and edges are stable.
Safety Margins and Budget
An extra 15 to 30 cm per side can protect your time and budget. The cost difference between a slightly larger sheet and a replacement order is significant. Add overlap when your edge treatment is heavy, your site is sloped, or your excavation is not perfectly uniform. A measured, conservative approach pays off.
Conclusion
Calculating pond liner size does not have to be complicated. Measure the longest length and width, measure the deepest vertical point from the final waterline, choose a practical edge overlap, and apply the formula. Round up to a stock size and match your underlayment. With a clear plan for folds and edges, you will set the liner once and move straight to rockwork and planting.
FAQ
Q: What is the easy formula to calculate pond liner size
A: Liner length = Max pond length + 2 x Max depth + 2 x Edge overlap, and Liner width = Max pond width + 2 x Max depth + 2 x Edge overlap.
Q: How much edge overlap should I allow on each side
A: For most ponds, allow 30 to 45 cm per side or 12 to 18 inches per side, and add more if you have wide coping, a raised edge, or heavy rainfall.
Q: Do shelves and slopes change how I calculate depth
A: No. Always use the deepest vertical distance from the final waterline to the bottom. Shelves do not change the depth number, and you should not measure along a sloped wall.
Q: Should underlayment be the same size as the liner
A: Yes. Size underlayment the same as the liner for a simple, protective installation that cushions the entire pond and edge.
Q: How do I size a liner for an irregular kidney shaped pond
A: Use the same formula with the longest straight span as length, the widest straight span as width, the deepest vertical depth, and the same edge overlap on both dimensions.