We are reader supported. When you purchase through links on our site, we may earn an affiliate commission. Also, as an Amazon affiliate, we earn from qualifying purchases.
Cleaning aquarium gravel does not need to be loud, messy, or scary for your fish. With the right routine, you keep the substrate clean, water clear, and fish calm. This guide breaks down what to do before, during, and after gravel cleaning so you remove waste without harming beneficial bacteria or stressing your fish. Follow the steps, avoid common mistakes, and build a simple routine you can repeat every week.
Why Aquarium Gravel Gets Dirty and Why It Matters
Gravel traps fish waste, leftover food, and plant debris. This organic load breaks down into ammonia and then nitrite and nitrate. If you let it build up, water quality worsens and oxygen can drop inside the substrate. That can lead to stress, illness, algae blooms, and unstable water parameters.
Regular gravel cleaning removes trapped debris, supports healthy biofiltration, and keeps water stable. Done gently, it does not disturb fish or crash the nitrogen cycle.
How Often to Clean Gravel
The right frequency depends on tank size, stocking level, feeding, and plant density. A good starting point for most community tanks is a light to moderate gravel vacuum every 1 to 2 weeks combined with a partial water change. Clean different sections each time and rotate through the whole floor over several sessions.
If you keep heavy waste producers like goldfish or messy cichlids, you may need weekly gravel cleaning. Lightly stocked or densely planted tanks can often stretch to every 2 weeks. Avoid infrequent deep cleanings that disturb the entire tank at once. Smaller, regular sessions are gentler on fish and bacteria.
Tools You Need
Prepare your tools before you start. This keeps the process quick and calm.
Gravel vacuum with siphon hose and intake tube sized for your tank depth. A narrow tip is safer around small fish and shrimp. A valve or flow control helps adjust suction.
Buckets used only for aquarium water. Label them to avoid soap or chemical contamination.
Tap water conditioner to remove chlorine and chloramine.
Thermometer to match new water temperature to the tank within 1 to 2 degrees Celsius or 2 to 3 degrees Fahrenheit.
Soft algae sponge for glass if needed. Avoid abrasive pads.
Priming bulb or siphon starter if you prefer not to use the submerge and lift method.
Prep Before You Start
Match New Water Temperature
Fill a bucket with replacement water and bring it close to the tank temperature. This reduces shock. Aim to match within 1 to 2 degrees Celsius or 2 to 3 degrees Fahrenheit. You can blend cold and warm tap water or let water sit indoors to reach room temperature.
Dechlorinate First
Add water conditioner to the replacement water before it enters the tank. Follow the dose on the bottle. This protects fish and beneficial bacteria in the gravel and filter.
Dim the Lights and Calm Fish
Bright light keeps fish alert and jumpy. Dim the room and tank lights. Move slowly, keep hands low, and avoid sudden movements. Close doors and windows to reduce drafts and noise. Allow a few minutes for fish to settle before you begin.
Unplug Sensitive Equipment
Turn off the heater and filter before draining water to prevent running them dry. If the heater becomes exposed to air while on, it can crack. Switch them back on only after the water level returns to normal.
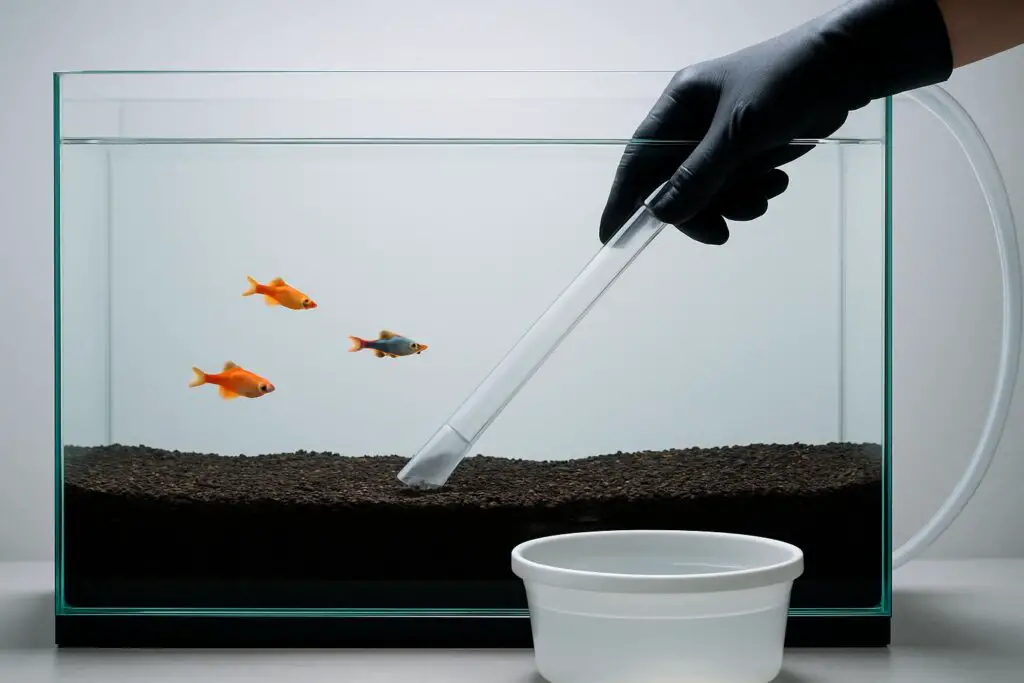
Step by Step: How to Vacuum Gravel Without Stressing Fish
Start the Siphon
Place the gravel vacuum intake in the tank and the hose end in a bucket set lower than the tank. Start the siphon with a priming bulb or by submerging the intake tube completely to fill it, lifting it just above the water surface to start the flow, then lowering it back in. Keep the bucket stable and within reach to avoid spills and rushing.
Control Suction to Reduce Stress
Use a valve or pinch the hose to reduce flow, especially in smaller tanks or around shy fish and shrimp. Gentler flow pulls in debris without flinging gravel around. Keep the intake tip a few millimeters above the gravel when fish crowd around it.
Work in Sections
Divide the substrate into two to four sections. Clean one section per session to protect the biofilter and keep the routine short. Push the vacuum tube vertically into the gravel, then lift slightly. Detritus will rise while gravel tumbles and falls back. Move in a slow grid. Avoid chasing fish with the vacuum. If a fish is curious, pause and let it swim away.
Stirring Is Not the Same as Cleaning
Do not stir gravel with your hand and leave debris in the water. Stirring releases waste into the water column and pushes fine particles into filter media. The vacuum should remove suspended waste as you lift it. If you accidentally stir, hold the intake in that area longer to collect the cloud.
How Much Water to Remove
For routine cleaning, remove 20 to 30 percent of the tank volume. This is enough to extract debris and refresh minerals without big swings in chemistry. In heavily stocked tanks, you can go up to 40 to 50 percent if you match temperature closely and pre dose dechlorinator. Avoid very large changes unless it is an emergency.
What to Do With Decorations and Plants
Move decorations only if debris collects behind them. Lift decor slowly and keep the vacuum intake near it to catch the cloud that rises. Rinse ornaments in old tank water only if they are coated with sludge. Avoid scrubbing away all biofilm.
For live plants rooted in gravel, vacuum lightly around the base. Do not uproot them during routine cleaning. For loose stems, lift gently and vacuum the spot, then replant. For artificial plants, swish them in old tank water during a maintenance session if they are trapping waste.
Special Cases and How to Adjust
Planted Tanks
Densely planted tanks rely on root zones and mulm as nutrients. Vacuum the open areas and surface only. Leave plant roots and substrate layers mostly undisturbed. Do small, frequent water changes to export excess nutrients without deep substrate disruption.
Shrimp and Fry Safe Approach
Use a fine pre filter or a sponge over the vacuum intake to prevent tiny animals from being sucked in. Reduce flow and keep the tip just above the gravel. Work slowly and give small inhabitants time to move.
Heavy Waste Producers
Goldfish, large cichlids, and plecos create more waste. Increase frequency to weekly cleaning and target their favorite resting spots and feeding zones. Siphon shortly after feeding time on maintenance day to catch leftovers before they decay. Keep an eye on nitrate. If it climbs fast, shorten the interval or increase percentage of water changed within safe limits.
New Tanks vs Mature Tanks
In new tanks, bacteria colonies are still growing. Vacuum lightly and avoid deep gravel disruption. In mature tanks, rotate sections and include a deeper clean once or twice a month if debris builds up beneath the surface.
Water Change and Refill
Add Water Slowly
Pour conditioned replacement water gently onto a plate or plastic bag placed on the substrate to avoid stirring debris. Add it slowly to prevent sudden current and temperature swings. Keep an eye on fish behavior. Calm, steady swimming means the process is not stressing them.
Restart Equipment in the Right Order
Once the water level is back to normal, plug in the heater, then the filter. Ensure the filter is primed and flowing. Check for leaks. Wipe up drips to keep the area safe and quiet.
Aftercare and Monitoring
Test Water Within 24 Hours
After the session, test ammonia, nitrite, and nitrate. You should see zero ammonia and nitrite in a cycled tank, and a modest drop in nitrate. If ammonia or nitrite appears, your cleaning may have been too aggressive, the tank is overstocked, or the filter needs attention. Adjust your routine rather than cleaning harder next time.
Feed Lightly
For the next day, feed a little less than usual. Less food means less waste while the system settles. Resume normal feeding after parameters remain stable.
Deep Cleaning Without a Full Tear Down
When to Deep Vacuum
If you see persistent detritus clouds when you disturb decor, brown pockets below the gravel surface, or a bad smell from the substrate, it is time for a deeper vacuum. Plan it on a day when you have time to move slowly and monitor fish after.
How to Deep Vacuum Safely
Clean one half of the gravel more thoroughly and leave the other half for next time. Insert the intake deeper and lift slowly to pull out compacted waste. Keep the flow moderate. Stop and pause if fish appear stressed. Do not clean the filter on the same day as a deep substrate session. Stagger filter maintenance by at least a week to preserve bacteria.
Common Mistakes to Avoid
Vacuuming the entire gravel bed aggressively in one session in a young or lightly filtered tank. This can unbalance bacteria and cloud the water.
Cleaning the filter and doing a deep gravel vacuum on the same day. Space them out by at least a week.
Using unconditioned tap water or mismatched temperatures during refill. Always dechlorinate and temperature match.
Stirring waste without siphoning it out. Always lift debris with the vacuum as you disturb it.
Chasing or cornering fish with the intake. Move slowly and let fish choose distance.
Neglecting tool hygiene. Rinse the vacuum and hoses with hot water after use and let them dry. Do not use soap.
Troubleshooting Results
Cloudy Water After Cleaning
Mild cloudiness is common and usually clears within a few hours as the filter traps fine particles. Do not add clarifiers unless needed. Check that you did not over stir the gravel. Next time, reduce flow and work smaller sections. You can place a fine floss pad in the filter for a day to polish the water, then remove it.
Lingering Bad Smell
A sulfur or rotten smell indicates trapped anaerobic pockets. Perform a series of gentle but thorough vacuum sessions over two to three weeks. Deep clean a different half of the substrate each time. Improve flow near the bottom with careful filter output direction. Avoid overfeeding that fuels decay.
Gravel Coated in Algae
Vacuum to remove loose algae and detritus, then adjust root causes. Reduce feeding, increase water change frequency, and ensure the photoperiod is not excessive. In planted tanks, balance nutrients and CO2 if used. Avoid scrubbing gravel harshly, which scatters algae and stresses fish.
Simple Weekly Maintenance Routine
Turn off heater and filter. Dim the lights.
Prepare new water. Match temperature and add conditioner.
Vacuum one section of gravel while removing 20 to 30 percent of water. Keep flow gentle.
Target areas with visible debris and around decor bases. Avoid uprooting plants.
Refill slowly onto a plate or bag. Match temperature.
Restart heater and filter. Check for normal flow.
Test water within 24 hours. Feed lightly for a day.
Extra Tips to Keep Fish Calm
Work at a steady pace. Predictability is less stressful than fast bursts.
Keep tools and buckets ready before you open the tank. Fewer pauses mean fewer surprises for fish.
Stand to the side rather than looming over the tank. Approach from the same side each time so fish learn the routine.
Use a narrower intake tube in small tanks. Less suction means gentler cleaning.
Skip cleaning if fish are ill or have just been moved. Wait until they stabilize.
Filter Care Timing and Method
Do not clean the filter on the same day you do a deep gravel vacuum. Stagger by at least one week. When you rinse sponges or bio media, use water taken from the tank during a water change, not tap water. This preserves beneficial bacteria that protect your fish from ammonia and nitrite spikes.
Signs You Are Cleaning the Right Way
Fish resume normal swimming within minutes after you finish.
Water remains clear or clears within a few hours.
Ammonia and nitrite remain at zero. Nitrate trends down slowly between sessions.
No strong odors come from the substrate.
Algae growth slows as waste export improves.
Conclusion
Cleaning aquarium gravel without stressing fish is about rhythm and restraint. Prepare conditioned, temperature matched water. Work in sections with gentle suction. Remove debris while protecting beneficial bacteria. Refill slowly and restart equipment in order. Test water and adjust feeding. When you follow this routine, your gravel stays clean, your biofilter stays strong, and your fish stay calm. Build the habit, keep each session short, and your tank will reward you with clear water and steady health.
FAQ
Q: How often should I clean aquarium gravel
A: Most community tanks do well with a light to moderate gravel vacuum every 1 to 2 weeks paired with a 20 to 30 percent water change. Heavily stocked tanks may need weekly sessions, while densely planted or lightly stocked tanks can stretch to every 2 weeks. Rotate sections rather than cleaning the whole bed at once.
Q: Do I need to remove fish when cleaning gravel
A: No. Keep fish in the tank, dim the lights, move slowly, and use gentle suction. Avoid chasing fish with the intake and let them choose distance. This approach prevents stress and keeps the biofilter stable.
Q: How much water should I change during gravel cleaning
A: Remove 20 to 30 percent for routine maintenance. In heavily stocked tanks you can go up to 40 to 50 percent if you closely match temperature and pre dose dechlorinator. Avoid very large changes unless it is an emergency.
Q: Can I clean the filter on the same day as a deep gravel vacuum
A: Avoid it. Stagger filter maintenance by at least a week. When you do clean the filter, rinse sponges or bio media in old tank water, not tap water, to protect beneficial bacteria.
Q: What if my water gets cloudy after vacuuming
A: Mild cloudiness often clears within a few hours as the filter polishes the water. Reduce stirring next time, work smaller sections, and use a fine floss pad in the filter for a day if needed. Feed lightly and monitor parameters.