We are reader supported. When you purchase through links on our site, we may earn an affiliate commission. Also, as an Amazon affiliate, we earn from qualifying purchases.
Artificial plants and ornaments make aquariums look tidy, colorful, and easy to manage. But they still collect algae, biofilm, and hard water deposits. If you ignore this build up, the tank looks dull, water quality can slip, and fish become stressed. The good news is that cleaning artificial decorations is simple once you know the right sequence, tools, and safety steps. In this guide you will learn how to clean without damaging paint, how to choose the best method for each type of grime, and how to do it without risking your fish or your biofilter.
Introduction
New aquarists often scrub too hard, use the wrong chemical, or clean everything at once. These mistakes can strip paint, leave harmful residues, or wipe out beneficial bacteria. This article lays out a practical system that works on common algae, brown diatoms, green spot algae, and mineral scale. You will see simple methods using safe household items and learn exactly when to choose vinegar, hydrogen peroxide, or a bleach dip. Follow the steps and you will restore crisp colors and clean lines in less time, with less risk.
What You Need Before You Start
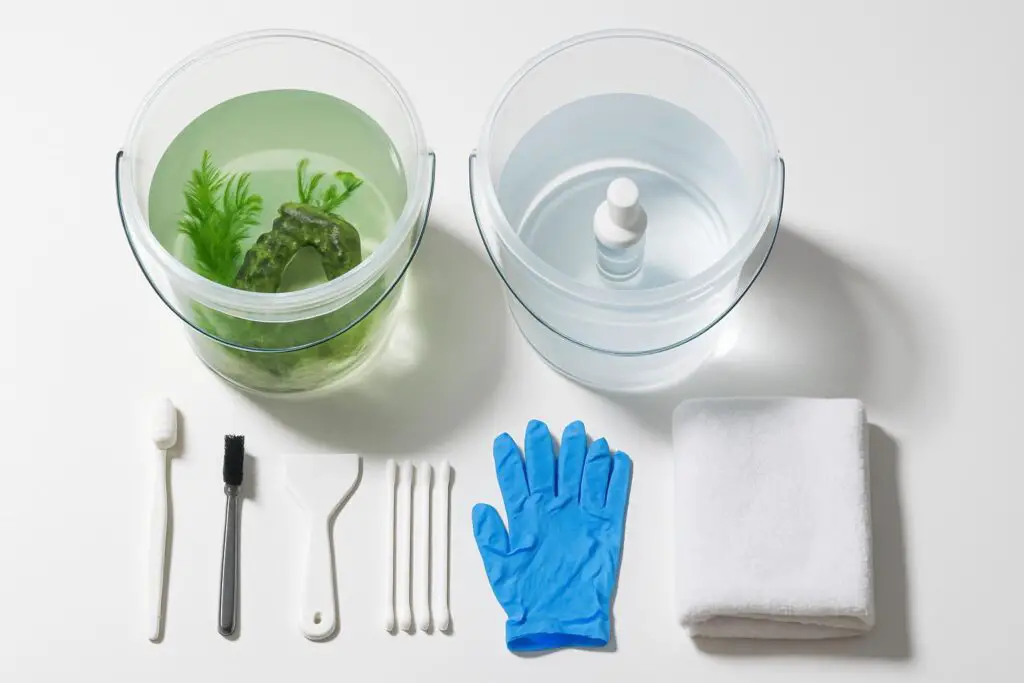
Gather two clean buckets used only for aquarium tasks. Fill one with tank water during a water change and keep one with fresh tap water plus dechlorinator according to the label. Have a soft sponge without scouring grit, a soft toothbrush, a small stiff nylon brush for textured crevices, cotton swabs, pipe cleaners or floss for small holes, and a plastic scraper such as an old credit card. Keep nitrile gloves and eye protection nearby, especially if you plan to use bleach or peroxide. Prepare white vinegar, citric acid powder if you have it, unscented household bleach containing 5 to 6 percent sodium hypochlorite, and 3 percent hydrogen peroxide.
Do not use soaps, detergents, scented cleaners, or metal scouring pads. Soap residues and perfumes harm fish even at low levels. Steel wool and harsh scrubbing pads can scratch plastic and resin, which encourages faster algae growth later.
Core Safety Principles
Protect Fish and the Biofilter
Never clean all decorations in one session. Clean no more than half at a time. Decorations host biofilm that supports the nitrogen cycle. Removing or sterilizing everything at once can unbalance the tank and spike ammonia. Keep filter media wet and running during cleaning, and return cleaned items only after they are fully rinsed and dechlorinated.
Protect Finishes and Materials
Painted resin, plastic plants, and silk leaves each react differently to heat and chemicals. Avoid very hot water on resin because it can warp. Avoid abrasive pads on painted surfaces. Use only diluted acids like vinegar or citric acid for mineral scale. For stubborn algae on tough plastic, a short bleach dip can be effective, but test a small hidden area if the item is painted.
Protect Yourself
Work in a ventilated space, wear gloves, and label buckets. Never mix bleach with vinegar or any acid because it produces toxic gas. Rinse tools between chemicals. Dispose of used solutions down the drain with plenty of water.
Pre Clean Checks That Save Time
Plan cleaning to coincide with a water change. Take a quick photo of your scape so you can put everything back easily. Inspect items as you remove them. Trim any sharp plastic flash left from manufacturing. Check for lifting paint or cracks. Separate items by material so you can choose the right method. Keep anything with batteries or LEDs away from liquid and clean it only with a damp cloth according to the manufacturer.
Fast In Tank Touch Ups
Many messes do not require removal. During weekly maintenance, use a soft toothbrush to loosen light algae from plant leaves while holding a siphon near the work area to catch debris. Direct a turkey baster at crevices to blow dust and uneaten food upward so the filter can collect it. Wrap a microfiber cloth around aquarium tongs to wipe flat surfaces underwater. Short, gentle sessions prevent heavy buildup and reduce the need for harsh cleaning later.
The Full Removal Workflow
Step 1 Prepare Your Station
Place bucket one with tank water for initial rinsing. Place bucket two with tap water and dechlorinator for final soaks. Keep brushes and scrapers ready. Lay out a towel for drying. If items belong to different tanks, label each area.
Step 2 Remove Items Without Stressing Fish
Take out only half of the decor at a time. Move slowly to avoid stirring debris clouds. If an ornament shelters timid fish, leave it in place this round and choose a different item to clean. Keep removed pieces submerged in bucket one to prevent dried on films that are harder to remove.
Step 3 Start With Mechanical Cleaning
Rinse in bucket one to shed loose mulm. Use a soft sponge and toothbrush to remove films. Work from the least aggressive method to more aggressive only if needed. Use pipe cleaners in small holes and a plastic scraper for flat areas. Often, this step removes most algae, and a specialty soak becomes optional.
Step 4 Match the Method to the Problem
For green algae film on plastic and resin, scrub with the soft toothbrush first. If residue persists, use a hydrogen peroxide soak. Submerge in 3 percent hydrogen peroxide for 15 to 30 minutes. Bubbles indicate oxidation of organics. Rinse well after soaking.
For stubborn green spot algae on hard surfaces, scrape with a plastic card, then do a brief peroxide soak or a short bleach dip if the item is not delicate. Green spot algae adheres strongly and often needs a combination of scraping and chemical help.
For brown diatoms common in new tanks, gentle brushing plus a peroxide soak is usually enough. Diatoms brush off more easily than green algae.
For blue green cyanobacteria slime, remove as much as possible mechanically. Follow with a peroxide soak to oxidize remaining film. Discard the soak water down the drain and rinse the item thoroughly.
For hard water deposits and white crust from calcium and magnesium, use mild acid rather than force. Soak in warm white vinegar diluted 1 to 1 with water for 30 to 60 minutes. For heavy scale, use citric acid at 5 to 10 grams per liter in warm water for 30 minutes. Scrub with a soft brush and rinse. Acid dissolves mineral scale without scratching.
For stained or yellowed plastic, a peroxide soak can brighten appearance. Avoid dye based cleaners. Persistent yellowing can also come from UV exposure and may not fully reverse.
Using a Bleach Dip Safely
A bleach dip is effective against stubborn algae on tough plastic plants and resin. Use unscented household bleach containing 5 to 6 percent sodium hypochlorite. Prepare a solution at 1 part bleach to 20 parts water in a well ventilated area. Submerge items for 10 to 15 minutes only. Do not use bleach on metal parts or delicate silk leaves. Never mix bleach with vinegar, citric acid, or any other acid. After the dip, rinse under running water, then soak in bucket two with dechlorinator until there is no bleach smell.
Step 5 Rinse and Neutralize
Rinse each item thoroughly. Move from tap rinse to the dechlorinator bucket. Swish for several minutes. Replace the dechlorinator water if you process many items. Smell the item. If any bleach odor remains, rinse again and repeat the dechlorinator soak. Peroxide breaks down to water and oxygen, but after a heavy peroxide soak, still rinse well to avoid irritating fish gills.
Step 6 Dry and Inspect
Air dry on a clean towel. Drying helps you spot any missed deposits. Check for loosened paint or sharp edges revealed by cleaning. Touch up any rough spots with fine sandpaper on plain plastic only, away from painted areas. Replace any cracked suction cups.
Step 7 Reassemble the Aquascape
Return items to the tank gently to avoid startling fish. Recreate your original layout using the photo as a guide. Anchor base rings of plants under a thin layer of substrate, not too deep, so you can clean them easily next time. Keep decor slightly away from the glass to allow your scraper to pass. Preserve open swimming areas and ensure filter outlets are not blocked.
Material Specific Tips
Plastic Plants
Plastic plants tolerate peroxide and a short bleach dip. Scrub with a toothbrush along each leaf. For heavy algae, bend leaves gently to open folds during soaking. Rinse and dechlorinate thoroughly after any chemical treatment.
Silk Plants
Silk leaves look realistic but are delicate. Avoid bleach and abrasive scrubbing. Use warm water, a soft sponge, and peroxide soaks only. Blot dry rather than twisting the fabric so you do not fray edges.
Resin and Ceramic Ornaments
Most resin items are painted and sealed. Avoid harsh abrasives and very hot water that can warp resin or lift sealant. Peroxide soaks are safe. Use a brief bleach dip only if the surface is robust and unpainted or minimally painted, and always test a hidden area first. Ceramic with a glazed finish tolerates acids and peroxide but still avoid heavy abrasion.
Artificial Rocks and Caves
Textured surfaces trap algae. Use a stiff nylon brush to reach grooves. For mineral scale, vinegar or citric acid soaks work well. Rinse thoroughly because textured surfaces can hold solutions in pores and crevices.
Suction Cups and Bases
Suction cups lose grip over time. Soak in warm water to restore flexibility. Clean algae from their undersides so they adhere better. Rinse and press them onto clean glass when reinstalling.
LED and Air Driven Decorations
Follow manufacturer guidance. Keep electrical connections dry. Wipe housings with a damp cloth rather than immersing parts that are not rated for submersion. For air stones, replace rather than try to deep clean if clogged, since scrubbing can release dust back into the tank.
Cleaning Frequency and Routine
Use a simple schedule. During weekly water changes, do in tank touch ups. Every 4 to 6 weeks, deep clean the half of the decor that looks worst. If algae grows fast due to strong lighting or high nutrients, shorten the interval. If the tank is stable and clean, extend it. New aquariums often see brown diatoms in the first months. This usually fades as the tank matures, so do not overreact with harsh chemicals. Keep your routine steady and predictable.
Prevention So You Clean Less
Control lighting. Aim for 6 to 8 hours per day on a timer. Reduce intensity if algae persists. Avoid direct sunlight on the tank. Feed fish lightly and remove uneaten food. Vacuum the substrate during water changes to reduce nutrient pockets. Rinse or replace mechanical filter media before it clogs. Maintain good flow so detritus does not settle on decor. If your tap water is very hard and leaves scale, wipe wet surfaces after maintenance and use vinegar or citric acid soaks as soon as you see early crust.
Keep a spare set of plastic plants so you can rotate. While one set is in service, the other set can soak and dry. This rotation reduces rush and helps you deep clean without stripping the tank bare.
Common Mistakes to Avoid
Do not use soap or scented cleaners. Do not mix bleach and acids. Do not scrub painted surfaces with abrasive pads. Do not put bleached items back before full dechlorination and a complete rinse. Do not clean all decorations at once. Avoid boiling water on resin. Do not overlook safety gear or ventilation when using chemicals.
Quick Reference Steps
Step 1 Plan cleaning during a water change and photograph the layout. Step 2 Remove no more than half the decor and keep it wet in tank water. Step 3 Start with brushing and scraping in bucket one. Step 4 Choose a method that matches the issue. Use peroxide for organics, vinegar or citric acid for scale, and a short bleach dip for stubborn algae on tough plastic. Step 5 Rinse well and soak in dechlorinated water. Step 6 Air dry and inspect. Step 7 Reassemble the scape and restore flow.
Results You Should Expect
Colors should look brighter, leaves and surfaces should be free of visible algae, and moving parts like bubble ornaments should move freely again. If algae returns quickly, shorten light duration, reduce feeding, improve flow, and step up weekly touch ups. If paint lifts or items warp, switch to gentler methods next time or replace the item with a higher quality decoration rated for aquarium use.
Conclusion
Cleaning artificial aquarium decorations and plants is straightforward when you use the right sequence. Start gentle, match the method to the problem, and protect fish and finishes at every step. With weekly touch ups, a 4 to 6 week deep clean, and smart prevention, your artificial scape will stay crisp, safe, and low maintenance. Follow the workflow and you will spend less time scrubbing and more time enjoying a clear, vibrant tank.
FAQ
Q: Can I use soap to clean artificial decorations
A: No. Avoid soaps and household detergents because residues harm fish. Use mechanical cleaning, vinegar, citric acid, hydrogen peroxide, or a diluted bleach dip followed by thorough dechlorination as described.
Q: How do I safely use bleach on plastic plants
A: Use unscented household bleach at 1 part bleach to 20 parts water for 10 to 15 minutes, then rinse well and soak in fresh water with dechlorinator until there is no bleach smell. Do not use on metal parts or delicate silk leaves, and never mix bleach with vinegar or acids.
Q: How often should I deep clean artificial plants and ornaments
A: Do quick touch ups weekly and plan a deeper clean every 4 to 6 weeks, adjusting based on algae growth, fish load, and light schedule.
Q: How do I remove hard water deposits from decorations
A: Soak in warm white vinegar diluted 1 to 1 with water for 30 to 60 minutes or use 5 to 10 grams of citric acid per liter, then scrub with a soft brush and rinse thoroughly.
Q: Is it safe to clean all decorations at once
A: No. Clean no more than half at a time so you do not crash the biofilter and stress fish.