We are reader supported. When you purchase through links on our site, we may earn an affiliate commission. Also, as an Amazon affiliate, we earn from qualifying purchases.
Clear water does not guarantee a healthy reef tank. Hidden organics accumulate fast, fuel algae, stress corals, and depress oxygen. A protein skimmer solves this upstream. It strips out dissolved waste before it breaks down, stabilizes key parameters, and gives you more room for error. If you want consistent coral growth, predictable nutrients, and fewer headaches, a skimmer belongs on your reef system.
Introduction
New reef keepers often focus on live rock, lighting, and heaters. Filtration gets attention, but the role of a protein skimmer can feel unclear. You might ask if it is optional, if water changes are enough, or which model to buy. This guide explains what a skimmer is, how it works, why it helps, how to size and tune it, and how to keep it running smoothly. By the end, you will know if your reef needs a skimmer and how to choose and use one with confidence.
What Is a Protein Skimmer
A protein skimmer is a piece of filtration that removes dissolved organic compounds from saltwater by creating foam and exporting it. Instead of waiting for waste to become nitrate and phosphate, a skimmer targets organics early and physically takes them out of the system.
The Core Job
The core job is nutrient export before nutrients exist in measurable form. This includes fish waste, uneaten food, bacterial byproducts, and other organics that would otherwise degrade into ammonia, nitrite, nitrate, and phosphate. By removing these precursors, a skimmer reduces the burden on your biofilter and holds nutrients in a tighter range.
How Foam Fractionation Works
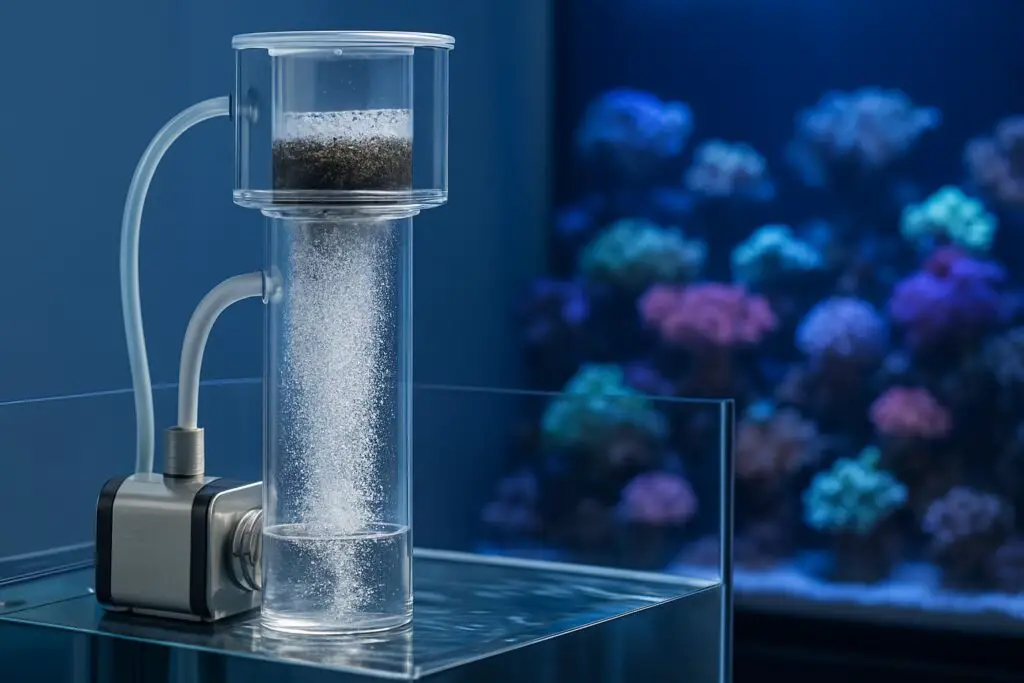
Skimmers rely on foam fractionation. A pump mixes air and water to create millions of fine bubbles in a contact chamber. Dissolved organics are hydrophobic. They cling to bubble surfaces and ride upward as a stable foam. That foam spills into the collection cup and condenses into dark liquid called skimmate. You then dump the cup and the waste leaves the tank permanently.
What a Skimmer Does Not Do
A skimmer does not remove nitrate and phosphate directly once they are already dissolved. It does not eliminate water changes. It does not replace biological filtration. Its strength is interception and export before breakdown occurs.
Why Your Reef Tank Needs One
Reef life is sensitive to excess nutrients and swings in oxygen and pH. A skimmer creates a more stable and forgiving system.
Nutrient Control and Algae Prevention
By pulling out organics before they mineralize, a skimmer lowers the amount of nitrate and phosphate that would otherwise accumulate. This makes algae less likely to bloom. Corals and beneficial bacteria face less competition. You spend less time fighting symptoms and more time observing growth.
Oxygen and pH Stability
Skimmers inject air constantly and promote gas exchange. This helps keep oxygen high, especially at night when photosynthesis stops. Better gas exchange also vents excess carbon dioxide, which can support a steadier pH. Tanks with adequate aeration recover faster from feeding and maintenance events.
Water Clarity and Coral Health
Removing colored organics improves clarity and light penetration. Corals receive more consistent light, and photosynthetic efficiency improves. Many reefers observe better polyp extension when organics and oils are controlled.
Safety Margin During Mistakes
Overfeeding, a dead fish, or a dirty filter sock can spike organics. A skimmer provides continuous export and can blunt the impact. This safety margin matters in dense reef systems where small slips can cascade.
Types of Protein Skimmers
Different designs fit different tanks and sumps. The best type is the one you can install, tune, and maintain reliably.
In-Sump Skimmers
In-sump models sit in a dedicated skimmer chamber. They are popular for stability and safety because any overflow falls back into the sump. They need a consistent water depth and a stable return section or a baffle. Most modern reef tanks use in-sump skimmers.
Hang-On-Back Skimmers
HOB skimmers hang on the back of a display or sump. They suit tanks without space for a sump. They are easier to add later but demand careful leveling and priming. Choose a unit with a reliable surface intake and bubble trap to protect display aesthetics.
External Recirculating Skimmers
External skimmers sit outside the sump and recirculate water through the skimmer body while being fed by a separate pump or drain. They offer high performance and flexible placement but require careful plumbing and overflow safeguards. They are best for large systems.
Pump Designs and Performance Notes
Needle-wheel and pin-wheel pumps chop air into fine bubbles. Venturi inlets inject air via a constriction. Air-stone driven skimmers are less common in reef tanks today but still work on smaller systems. DC pumps allow fine speed control and can run quieter. AC pumps are simple and durable. Bubble fineness, air draw, and stability matter more than brand names.
How to Choose the Right Size
Skimmer sizing is not only about the number on the box. Focus on fit, air and water handling, and your actual bioload.
Tank Volume vs Bioload
Manufacturer ratings assume moderate bioload. If you run a heavy fish load or feed often, size up. For light stocking, you can choose a model closer to your display volume. Oversizing too much can reduce foam stability if the neck and air draw are not matched to your waste level.
Air Draw, Neck Size, and Contact Time
Air draw influences how much organics the skimmer can lift. Neck diameter affects foam stability. Contact time ensures organics meet bubbles long enough to attach. These elements need balance. A massive neck with low waste may never build a stable head. A small, efficient body with good air and consistent depth can outperform a larger but mismatched unit.
Footprint, Water Level, Noise, and Power
Measure your sump chamber. Check the required operating depth and whether a stand or platform is needed. Consider noise if the tank is in a living space. DC pumps often help. Power consumption matters over long periods. Simpler designs are easier to clean and often more reliable.
Setup and Tuning Guide
A careful setup shortens break-in time and leads to stable performance.
Placement and Water Depth
Place the skimmer in a chamber with a fixed water level, typically 6 to 10 inches depending on the model. Use the manufacturer recommendation. If your sump fluctuates, add a baffle or an auto top off. Keep the skimmer air intake away from salt spray and the lid vented.
Break-In Period
New skimmers need time to develop a stable foam head. Plastics and oils reduce surface tension. Expect 3 to 14 days of variable performance. During this time, keep the outlet more open to avoid overflow. After break-in, you can raise the foam level for your target wetness.
Tuning Wet vs Dry
Wet skimming pulls lighter colored skimmate faster and more diluted. It favors aggressive nutrient export but needs more frequent emptying. Dry skimming produces darker, thicker skimmate and can be less disruptive. Adjust the water level inside the skimmer by raising or lowering the outlet or using the gate valve. Increase air for drier foam, reduce air or raise water for wetter foam, within the design limits of the unit.
Managing Microbubbles
Some bubbles escape into the sump during break-in or after cleaning. Use the built-in bubble trap if present. Keep the skimmer in the first chamber and route water through baffles and a sock before the return pump. Microbubbles usually subside as biofilms form and tuning stabilizes.
Daily and Periodic Maintenance
Consistency keeps performance high and prevents surprises.
Cup and Neck Cleaning
Foam collapses when it hits a dirty neck. Clean the cup and neck every few days or weekly. A quick wipe with a dedicated sponge or paper towel restores foam rise. Avoid soap. Reassemble carefully to maintain the seal.
Pump and Venturi Care
Salt creep and calcium deposits restrict air and ruin performance. Give the pump and venturi a vinegar soak every 1 to 3 months depending on buildup. Remove and rinse the impeller and housing. Clear the airline and silencer. Confirm that the air intake draws freely.
When to Pause or Adjust
Some additives, epoxy, oily foods, and water conditioners can cause a skimmer to overflow or stop foaming. Use a feed mode and pause the skimmer for 30 to 60 minutes during heavy feeding or dosing that affects surface tension. You can also raise the cup height or open the outlet temporarily to prevent a flood. Resume normal settings after foaming stabilizes.
Troubleshooting
Most skimmer problems come down to water depth, air restriction, residue, or additives. Work through these in order.
Skimmer Overflowing
Check for recent additives, epoxy, or filter sock changes. Lower the internal water level by opening the gate valve. Reduce pump speed if using a DC pump. Raise the collection cup. Clean the neck. If the cause is an additive, pause the skimmer for a short period and restart with a lower foam level.
No Skimmate Produced
Confirm depth and that the pump is pulling air. Clean the venturi and airline. Inspect the impeller. Ensure the tank has sufficient organics; a very clean tank or an oversized skimmer may produce less. Raise the internal water level slowly and wait through the break-in if the unit is new or just cleaned.
Erratic Foam or Sudden Stops
Look for fluctuating sump water level. Add or fix an auto top off. Avoid placing the skimmer outlet near the skimmer intake where turbulence recirculates bubbles. Replace or rinse carbon if it becomes dusty. Keep hands and oils out of the water before critical testing or tuning.
Do You Ever Not Need a Skimmer
Many successful reefs run skimmers because they add stability. That said, there are narrow cases where strict husbandry can substitute.
Nanos and Heavy Water Change Schedules
A lightly stocked nano with strict, large, and frequent water changes and careful feeding can do well without a skimmer, but the margin for error is smaller. Missed maintenance or a feeding mistake will show up faster. If you want more leeway, add a small skimmer.
Refugium and Other Export Methods
A refugium with fast-growing macroalgae, strong mechanical filtration, and careful feeding can control nutrients. A skimmer still helps by raising oxygen, improving clarity, and handling the unexpected. Many reef keepers run both for redundancy and steadier results.
Best Practices and Pro Tips
Small, consistent actions outperform big, rare interventions.
Run Time and Feed Mode
Run the skimmer 24 or 7 for the best oxygenation and export. Use a feed mode to pause it briefly during heavy feeding or dosing that affects foaming. Resume automatically to avoid forgetting.
Consistency Beats Intensity
Tune for stable, daily export rather than chasing a darker cup. Keep the water depth steady. Clean the neck regularly. Document settings so you can return to baseline after maintenance. Avoid constant knob turning.
Common Myths Clarified
A skimmer pulls out nitrate and phosphate only indirectly. It intercepts the organics that would have created them. A skimmer does not replace water changes; it reduces the load on your system but you still need water changes to replenish trace elements and remove what the skimmer cannot export. A skimmer is not only for dirty tanks. It is a tool for stability in clean, controlled systems.
Safety and Reliability
Place the skimmer where an overflow returns to the sump. Use a collection cup with a drain hose into a sealed container if your system is prone to overflow, and consider a float switch to cut power if the waste container fills. Keep power cords dry and use a GFCI outlet. Do not restrict the outlet in a way that traps pressure.
Cost and Noise Considerations
Budget for the long term. Efficient pumps save power over years. DC control and air silencers reduce noise. A well-tuned, moderate skimmer that you can clean easily often outperforms an oversized, loud unit that you avoid servicing. Choose proven models with available parts and support.
A Simple Setup Checklist
Measure your sump chamber and water depth. Match a skimmer that fits with room to remove the cup. Install at the recommended depth or build a stand. Route the air intake to a dry spot with a silencer if included. Start with the outlet open and the water level low. Let it run for a few days. Raise the foam level a little at a time. Clean the neck. Recheck after each change. Add a feed mode and a reminder to empty the cup.
Conclusion
A protein skimmer is one of the most effective upgrades you can add to a reef tank. It removes dissolved organics before they turn into measurable nutrients, raises oxygen, improves clarity, and buffers you from routine mistakes. Choose a model that fits your sump and bioload, set it at the right depth, tune gradually, and keep it clean. You will see steadier nutrients, fewer algae issues, and a healthier environment for fish and corals. Keep your approach simple and consistent, and let the skimmer handle the daily grind of export.
FAQ
Q: What does a protein skimmer remove from a reef tank?
A: A skimmer removes dissolved organic compounds such as fish waste, uneaten food, and bacterial byproducts before they break down into ammonia, nitrite, nitrate, and phosphate.
Q: How does a protein skimmer work?
A: It creates millions of fine air bubbles in a contact chamber; organics stick to bubble surfaces and rise as foam into a collection cup, where they concentrate as dark skimmate for easy removal.
Q: Do I still need water changes if I run a skimmer?
A: Yes. A skimmer does not replace water changes; it reduces the load on your system but you still need water changes to replenish trace elements and remove what the skimmer cannot export.
Q: How often should I clean a protein skimmer?
A: Clean the cup and neck every few days or weekly, and give the pump and venturi a vinegar soak every 1 to 3 months depending on buildup.
Q: When might a reef tank run successfully without a skimmer?
A: A lightly stocked nano with strict, large, and frequent water changes and careful feeding can do well without a skimmer, but the margin for error is smaller.