We are reader supported. When you purchase through links on our site, we may earn an affiliate commission. Also, as an Amazon affiliate, we earn from qualifying purchases.
Cherry shrimp are beginner friendly, colorful, and fast breeding. With the right setup and a simple routine, you can build a stable, self-sustaining colony that produces healthy babies month after month. This guide gives you a clear plan from empty tank to thriving shrimp room basics, with exact parameters, daily and weekly tasks, and fixes for common problems.
Introduction
Cherry shrimp breed well in small tanks, as long as water is stable, oxygen is high, and food is steady but not excessive. You do not need complicated gear or rare foods. You do need patience during the first month while the tank cycles and builds biofilm. Follow the steps below, keep records, and resist rushing. Results come fast once the system is stable.
What to expect when breeding cherry shrimp
Females carry eggs under their abdomen for 20 to 30 days depending on temperature. Baby shrimp are born as tiny copies of the adults. They do not have a larval stage, so they can feed and hide right away. A healthy beginner colony can double every 1 to 2 months after the first babies arrive. Stability is the key driver of growth. Big swings in temperature, TDS, or pH slow breeding.
Choose healthy breeding stock
Where to buy and quarantine
Buy from a trusted breeder or store that keeps shrimp in stable, clean water. Ask about their parameters so you can match them. Quarantine new shrimp for two weeks in a separate small tank or breeder box with a sponge filter and plants. Quarantine protects your main tank from pests and disease.
Sexing and starting ratio
Females are larger and more colorful, with a curved underbelly and a visible saddle behind the head when not berried. Males are slimmer and less colorful. Start with 10 to 20 shrimp, with about 2 females for each male. This ratio supports steady breeding without constant male chasing.
Color grades and goals
Higher color grades look bright but can be more sensitive. For a first colony, pick strong, active shrimp with good appetite. As the colony grows, remove the palest individuals to keep color quality consistent.
Equipment and tank setup
Tank size and layout
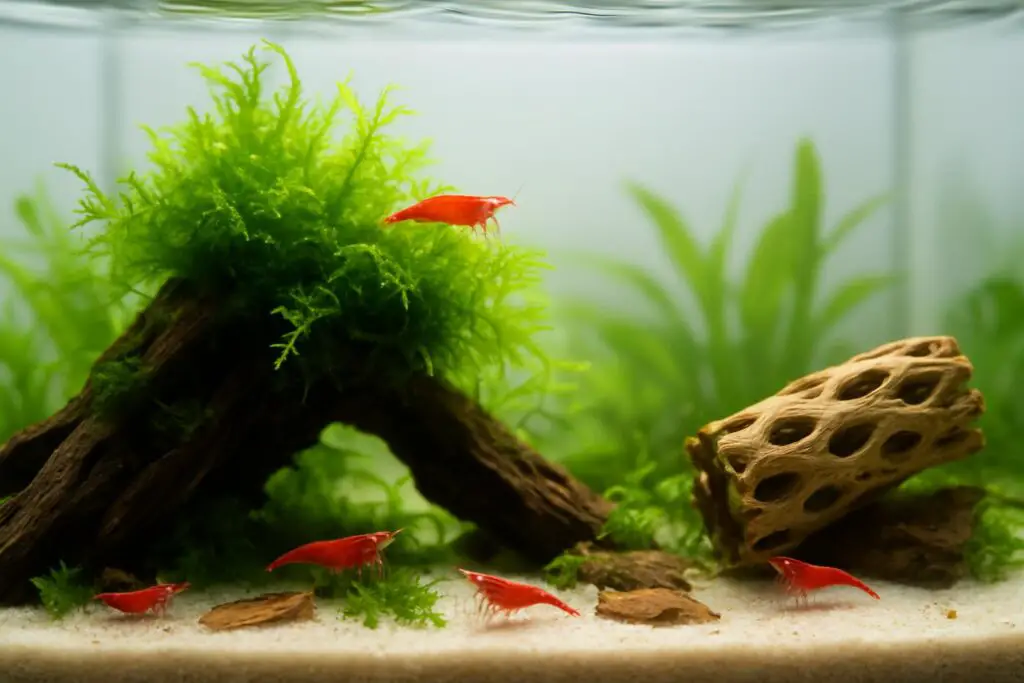
Start with 10 to 20 gallons for easier stability. Smaller tanks work but are less forgiving. Leave open front glass for viewing. Stack plants, moss, and wood to create shaded zones and surfaces for biofilm.
Filtration and flow
Use an air driven sponge filter or a gentle hang on back with a sponge prefilter on the intake. Aim for gentle circulation. Surface ripple improves oxygen.
Substrate and minerals
Use inert sand or fine gravel for stable pH. If your tap is very soft, use reverse osmosis water and add shrimp minerals to reach the target GH and KH. Avoid active planted soil for your first shrimp tank because it can swing pH and leach nutrients.
Plants, moss, and hardscape
Choose slow growers that hold biofilm well. Java moss, subwassertang, anubias, buce, fern, and floating plants work well. Add cholla wood, alder cones, and leaf litter to grow microfauna and provide hides.
Light and photoperiod
Use low to medium light for 6 to 8 hours daily. Too much light drives algae blooms and swings. A simple timer keeps the schedule steady.
Heater and temperature control
Keep temperature 21 to 24 C, 70 to 75 F. Use a reliable heater if your room swings. Warmer water speeds breeding but reduces oxygen, so do not chase high temps.
Useful tools
Have a TDS meter, liquid GH and KH tests, ammonia, nitrite, and nitrate tests, a turkey baster for spot cleaning, a drip line for acclimation, and a small container for rinsing filter sponges in tank water.
Water parameters and cycling
Target parameters
Use pH 6.5 to 7.6, GH 6 to 8 dGH, KH 2 to 4 dKH, TDS 150 to 250 ppm, and temperature 21 to 24 C. Keep ammonia and nitrite at 0 and nitrate under 20 ppm. Pick a target in the middle and stick with it.
Cycling before shrimp
Run the tank with filter, plants, and hardscape for at least 4 weeks. Seed the filter with media from an established tank if possible. Dose a small pinch of fish food or pure ammonia to feed bacteria. Test weekly. Do not add shrimp until ammonia and nitrite read 0 on two tests in a row.
Mineral balance
GH supplies calcium and magnesium for shells. KH buffers pH against swings. If your tap is very soft, remineralize RO or distilled water to GH 6 to 8 and KH 2 to 4. Track TDS so you can match new water to the tank.
TDS management
Evaporation raises TDS. Top off with pure RO or distilled water only. Water changes reduce nitrate and reset trace elements. Remineralize new water to the same GH, KH, and TDS as the tank before adding it.
Dechlorination and metals
Always use a dechlorinator on tap water. Avoid copper. Some fertilizers and medications contain copper and can harm shrimp. If you keep plants, use shrimp safe doses only.
Step by step setup timeline
Day 0 to 1
Rinse tank and gear. Place substrate and hardscape. Plant moss and easy plants. Install sponge filter or HOB with a sponge prefilter. Fill with dechlorinated water. Start heater and air. Set light to 6 hours.
Week 1 to 2
Add a source of ammonia for cycling. Add a small amount of powdered bacteria food or a botanicals leaf to start biofilm. Test every few days. Do not clean surfaces. Biofilm is food for shrimp and babies.
Week 3 to 4
Ammonia should drop to 0. Nitrite should spike then fall to 0. Nitrate rises. Do a 30 percent water change and match parameters. If everything is stable for a week, you can plan for shrimp.
Week 5
Optionally add a few pest free snails to boost biofilm and help with cleanup. Adjust light to 7 to 8 hours if plants are healthy.
Week 5 to 6 Shrimp arrival
Turn off tank lights. Float the bag for 15 minutes to match temperature. Set up a drip line and drip tank water into the bag at 1 to 2 drops per second. When volume doubles, remove half and repeat once. Total time 60 to 90 minutes. Net the shrimp into the tank. Discard the bag water. Do not feed on day one. Start with a tiny amount on day two.
Feeding for breeding and baby survival
Biofilm first
Biofilm and algae are the main food. Your plants, wood, and leaves grow this natural buffet. A steady light schedule and stable water make it last.
Simple weekly plan
Feed tiny amounts that shrimp finish in 2 to 3 hours. Use a feeding dish to control mess.
Example routine
Day 1 staple shrimp pellets or granules
Day 2 blanched vegetable like spinach or zucchini, remove after 4 hours
Day 3 rest day
Day 4 protein boost with a small high protein shrimp food
Day 5 leaves or botanicals for long lasting graze
Day 6 algae wafer crumb
Day 7 rest day
For babies
Dust a bacteria powder or very fine food once or twice a week so it spreads through the tank. Babies graze all day. Keep surfaces clean of debris but do not scrub away biofilm.
Do not overfeed
Leftovers cause ammonia spikes and planaria. If you see food after 3 hours, reduce the next feeding by half.
Breeding process and signs
Molting and mating
Females molt before breeding and release hormones. Males swim actively to find them. After mating, the female moves eggs from her saddle to under her tail. She fans them with swimmerets.
Incubation time
Eggs hatch in 20 to 30 days depending on temperature. Warmer water hastens hatch but can lower oxygen. Keep within the target range and avoid swings.
Baby care focus
Newborns hide in moss and wood crevices. They eat biofilm, fine powders, and soft algae. Provide dense plant and moss cover and stable water. No special nursery is needed in a shrimp only tank.
Routine maintenance for stable breeding
Water changes
Change 10 to 20 percent weekly or every two weeks. Prepare new water with the same GH, KH, TDS, and temperature as the tank. Add it slowly. A drip or a slow pour across a plate works well.
Filter care
Rinse sponge media in a bucket of tank water every 2 to 4 weeks. Never in tap water. Keep the prefilter sponge clean so babies are not sucked in.
Cleaning and pruning
Use a turkey baster to remove debris from the feeding dish and dead leaves. Trim plants as needed. Do not deep vacuum the substrate. Shrimp graze on it.
Population control and culling
As the colony grows, move extra shrimp to a second tank. Cull the palest shrimp if you aim for strong color. A species only tank gives the best yield and color consistency.
Safe tank mates and what to avoid
Best companions
Nerite and ramshorn snails are safe and useful. For breeding focus, skip fish. Even small fish can eat babies. If you must keep fish, accept lower baby survival.
Chemicals and hazards
Avoid medications with copper or strong plant treatments. Keep aerosols and soaps away from the tank. Use shrimp safe fertilizers at low dose if needed and watch for stress.
Troubleshooting common problems
No breeding after a month
Check parameters. Aim for the target ranges and keep them steady. Raise oxygen with more surface ripple. Add more hides and moss. Make sure you have both sexes and at least a few mature females. Offer a small protein meal once a week.
Failed molts
Failed molts point to mineral issues or swings. Verify GH 6 to 8 and KH 2 to 4. Match TDS on water changes. Stop large changes. Keep temperature steady. Provide a calcium source through proper remineralization, not cuttlebone alone.
Sudden deaths
Test ammonia, nitrite, and nitrate. If ammonia or nitrite is above 0, do an immediate partial change with matched water and reduce feeding. Check for contamination from aerosols or untreated tap water. Add extra air. Review any new foods or fertilizers used in the last week.
Planaria or hydra
They show up with overfeeding. Cut feeding in half. Siphon them during water changes. Use traps and frequent small removals. Avoid harsh medications that can harm shrimp.
Fungal fuzz on food or wood
This is common on new wood and leftover food. Shrimp and snails will eat soft biofilm, but remove uneaten food within a few hours. Keep the routine light and consistent.
Harvesting and sharing your shrimp
Safe catching
Use a small shrimp net or a shrimp trap with food bait. Move shrimp into a container of tank water. Work slowly to avoid stress.
Bagging and transport
Use clean bags with plenty of air and a small piece of moss for grip. Keep the bag cool and out of direct sun. For new homes with different water, advise drip acclimation on arrival.
Putting it all together A simple checklist
Before shrimp
Set tank with sponge filter, plants, wood, and leaf litter. Cycle 4 weeks. Confirm 0 ammonia and nitrite. Set stable parameters within the target range. Grow biofilm.
First month with shrimp
Feed very lightly. Keep light at 6 to 8 hours. Do small, matched water changes. Clean the prefilter as needed. Watch for saddled and berried females.
After babies arrive
Dust fine food once or twice a week. Maintain cover and gentle flow. Keep the routine steady. Plan for population growth and a second tank if needed.
Conclusion
Breeding cherry shrimp is simple when you commit to stability, soft hands, and a light touch on feeding. Build biofilm, match minerals, keep oxygen high, and avoid swings. Start with healthy stock, give them plants and hides, and follow the routine. In a few weeks you will see saddles, then berries, then a wave of tiny shrimp grazing across the glass and moss. Stay consistent, log your parameters, and your colony will reward you with constant activity and color.
FAQ
What water parameters are best for breeding cherry shrimp?
Use pH 6.5 to 7.6, GH 6 to 8 dGH, KH 2 to 4 dKH, TDS 150 to 250 ppm, and temperature 21 to 24 C 70 to 75 F. Keep ammonia and nitrite at 0 and nitrate under 20 ppm.
How many cherry shrimp should I start with?
Start with 10 to 20 shrimp, with about 2 females for each male, so the colony builds quickly and stress stays low.
How long until I see babies after a female is berried?
Eggs hatch in 20 to 30 days depending on temperature, then babies hide in moss and start grazing right away.
What is a simple feeding routine for a shrimp colony?
Feed tiny portions that are gone in 2 to 3 hours, rotate staple pellets, blanched vegetables, a weekly small protein boost, leaves or botanicals, and include one or two rest days.
Why do my shrimp die after molting?
This points to mineral imbalance or swings. Keep GH 6 to 8 and KH 2 to 4, match TDS and temperature on water changes, and avoid large changes.