We are reader supported. When you purchase through links on our site, we may earn an affiliate commission. Also, as an Amazon affiliate, we earn from qualifying purchases.
Anchor worm is a parasite that scares many aquarium keepers because it is easy to recognize but tricky to eliminate for good. You see a thin thread sticking from a fish, the fish flashes against decorations, and red sores appear. The longer you wait, the more fish get hit. This guide gives you clear steps to identify anchor worm fast, treat it safely, and prevent it from returning. The plan works for beginners, indoor tanks, and ponds. Follow it closely, treat the whole system, and watch your fish recover.
What Anchor Worm Is and Why It Matters
Anchor worm, or Lernaea, is not a worm. It is a crustacean parasite related to copepods. The adult female burrows into the skin or gills and anchors under the surface. A thin greenish or off-white thread hangs out, often with two small egg sacs at the end. The buried head irritates and wounds the tissue. This opens the door to bacteria and fungus.
Lernaea has a multi-stage life cycle. Eggs hatch into tiny free-swimming larvae that you cannot see with the naked eye. These stages drift in the water for days, searching for fish to attach to. This is why you cannot cure anchor worm by plucking visible adults alone. If you do not break the life cycle in the water, new juveniles will reattach.
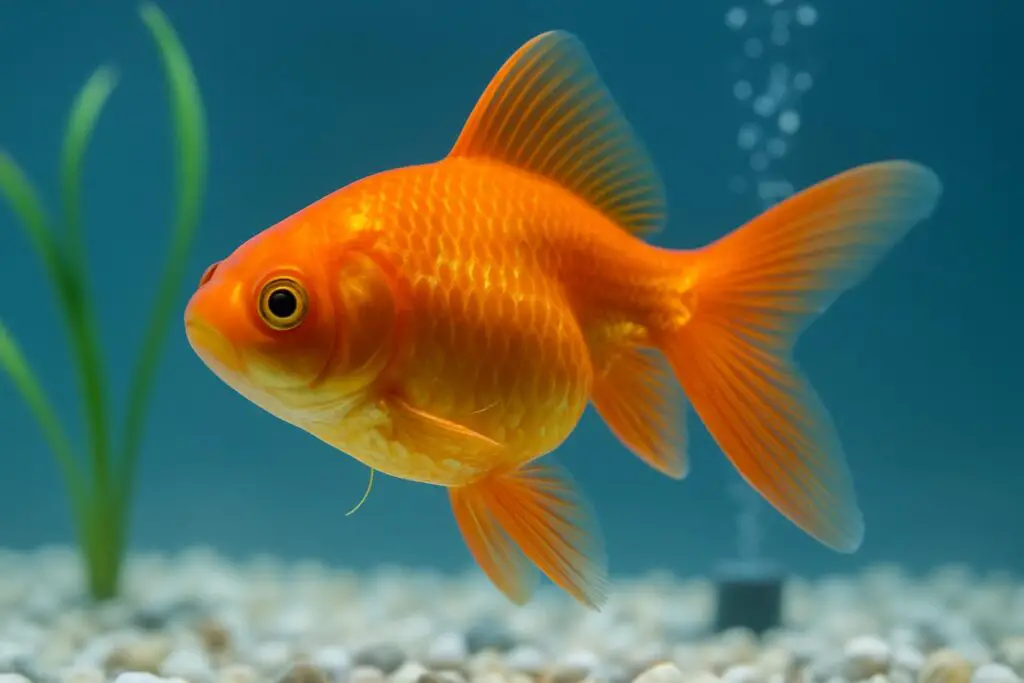
Goldfish, koi, and cichlids are common targets, but any fish can be infected. Ponds are at higher risk because of exposure to wild sources, but aquarium outbreaks happen after adding new fish, plants, or live foods.
How Anchor Worm Enters Your Aquarium
Anchor worm typically enters through one of these routes:
- New fish carrying attached adults or larvae
- Unquarantined plants that transported larvae
- Live foods collected from outdoor sources
- Shared nets, siphons, or buckets used between systems
- Outdoor ponds colonized by birds or other wildlife
Quarantine of new stock prevents most cases, but if you skipped it, act quickly now to contain spread.
Early Signs You Can Spot
Learn the telltale signs so you can act before the tank is overrun:
- Thin white to greenish threads 2 to 20 mm long sticking from body, fins, or gills
- Two tiny egg sacs at the end of the thread on some individuals
- Red, inflamed skin at the attachment point
- Flashing, rubbing, sudden darting
- Reduced appetite, weight loss in chronic cases
- Heavy breathing or gasping if gills are involved
- Secondary fungal tufts or ulcerated sores
How to Confirm It Is Anchor Worm
Anchor worm can be identified with the naked eye in many cases. Hold a flashlight at an angle and look for a thin thread with a forked tail and sometimes paired egg sacs. The base is often red or raised. Use a phone macro lens or magnifier if needed.
Do not confuse it with these lookalikes:
- Ich: many small white grains like salt across the body, not long threads
- Fungal growth: fluffy cotton-like patches, not a single firm filament
- Leeches: short, flexible, slug-like bodies that move and detach
- Camallanus worms: red worms protruding from the vent only
- Damaged fin rays or plant fibers stuck on the fish: no red base, come off easily
If you see one confirmed anchor worm, assume larvae are present in the water and plan to treat the whole system.
Immediate Actions on Day 1
Do not rush to yank every worm you see. Start with system preparation:
- Test water for ammonia, nitrite, nitrate, pH. Fix any spikes. Parasite stress plus poor water kills fish fast.
- Increase aeration. Run air stones or raise filter outflow.
- Vacuum the substrate to remove organic debris. Parasites thrive in low flow, dirty conditions.
- Remove carbon and turn off UV before dosing any medication.
- Move shrimp and crayfish to a separate tank. Most anchor worm treatments kill crustaceans.
Prepare a hospital container if you need to isolate weak fish or do dips. Set up clean nets and tweezers, disinfected with boiling water or a strong dechlorinator solution. You are getting ready for a staged, controlled treatment.
The Core Treatment Plan
Prepare the Tank for Treatment
Stability matters. Do a 25 to 40 percent water change, then stop feeding heavily while you treat. Keep filters running but remove chemical media that would absorb medication. Maintain stable temperature and ensure strong aeration, especially if you treat a stocked tank.
Use Medication That Breaks the Life Cycle
Two proven approaches control the free-swimming stages and stop new attachments:
- Diflubenzuron or other chitin inhibitors formulated for fish lice and anchor worm
- Potassium permanganate baths or pond-wide treatments when used correctly
For most aquariums, a diflubenzuron-based product labeled for anchor worm is the most beginner friendly option. It prevents crustaceans from building new exoskeletons, which halts development of larvae and juveniles. Adults may not drop immediately, but the life cycle is broken.
Key points for diflubenzuron:
- Follow the product label exactly. Dose the full system volume after removing carbon and turning off UV.
- Repeat the dose every 7 days for 2 to 3 rounds. This catches larvae as they hatch and progress through stages.
- Do not keep shrimp or crayfish in the treated tank. Move them to a separate system.
- Maintain aeration and watch fish closely after each dose.
Potassium permanganate can be effective, but it requires experience and precise dosing. If you choose this route, use a separate treatment container, strong aeration, and strict timing. Neutralize after the bath as directed by the product and never guess the dose. If you are not confident, use diflubenzuron instead.
Copper medications do not work on anchor worm. General parasite cures aimed at protozoa will not stop Lernaea. Do not waste time on them.
When to Use Salt Baths and Dips
Salt supports osmoregulation and can reduce stress. It can also help knock back some free stages, but salt alone rarely removes established adult females. Use salt as supportive care, not as the core cure.
Two useful methods:
- Tonic salt in the tank at low concentration for healing and stress reduction after medication, typically 0.1 to 0.3 percent. Dissolve completely before adding. Avoid with delicate scaleless species unless you have prior experience.
- Short salt dips for individual fish at higher concentration around 3 percent for up to 5 minutes, with constant observation. End the dip early if the fish rolls or goes limp. This can weaken attached parasites and help relieve irritation.
Salt helps fish recover, but it does not replace a life cycle breaking medication.
Manual Removal the Safe Way
Manual removal is most practical for larger, hardy fish such as goldfish and koi. In small or delicate fish, pulling can cause tearing and infection. If you cannot hold the fish safely, rely on medication and supportive care instead.
Steps for safe removal when appropriate:
- Prepare a shallow container with tank water and a soft, wet towel.
- Use a disinfected, fine tweezers. Wash your hands and wet them.
- Hold the fish gently but firmly, keeping the gills submerged if possible.
- Grip the parasite close to the skin at the base of the thread. Pull in a steady, straight motion. Do not twist.
- If it breaks and the head remains inside, do not dig. Return the fish to medicated water and try again a day or two after dosing, when the parasite is weaker.
- Dab the site with a tiny amount of povidone iodine or 3 percent hydrogen peroxide using a cotton swab, then rinse in clean tank water. Avoid contact with gills and eyes.
Manual removal is best done after the first medication dose so most larvae are being controlled and adults are weakened. Always limit handling time.
Handle Wounds and Secondary Infections
Anchor worm often leaves a crater-like wound. Keep the water clean and well oxygenated to speed healing. If you see redness spreading, whitish slime, fuzzy growth, or deep ulcers, treat in a hospital tank with a broad-spectrum antibacterial as directed by the label, such as a nitrofuran or kanamycin based product. Complete the full course. Do not medicate the main tank with antibiotics unless you have no alternative, because you may damage the biofilter.
Continue to observe for 2 to 3 weeks. New sores after day 10 suggest the life cycle is not fully broken or dosing intervals were missed.
Treat the Whole System, Not Just One Fish
Because larvae are free-swimming, treating only the visibly affected fish will fail. Dose the entire display tank or pond. If you choose to isolate a badly affected fish for special care, still medicate the main system on schedule or the problem will return as soon as the fish goes back.
Tank and Pond Scenarios
Indoor Community Tanks
Community tanks with tetras, barbs, livebearers, and corydoras need careful dosing and strong aeration. Many community fish handle diflubenzuron products well when used correctly. Remove shrimp and crayfish in advance. Use manual removal only on hardy medium to large fish. For small fish, focus on medication plus pristine water.
Goldfish and Koi Ponds
Ponds are where anchor worm is most common. Treat the whole body of water. Diflubenzuron is often the easiest route. Trichlorfon and other organophosphates have been used historically in ponds, but they are risky and should be handled only by experienced keepers with proper safety gear and exact dosing. Maintain high aeration and filter bypass if using oxidizing treatments like potassium permanganate. Monitor ammonia closely when algae or biofilms are affected by treatment.
Shrimp and Snail Tanks
Diflubenzuron kills shrimp and crayfish. Move them to a separate tank for at least 4 weeks. Most snails are not crustaceans, but avoid exposing them to any medication unless the label says it is safe, because some products include solvent carriers or other agents that harm invertebrates. If you must preserve shrimp colonies, consider moving fish out and treating them in a separate quarantine tank, while you run the shrimp tank fishless for 6 to 8 weeks so larvae die off without hosts.
Recovery Timeline and What to Expect
Day 1 to 2: Improved behavior after aeration and first dose. Fish may still flash. Adults may remain attached.
Day 3 to 7: Many adults weaken and some detach. Inflammation may persist around old wounds. No new threads should appear if dosing is correct.
Day 8 to 14: Second dose breaks the next wave. Most visible parasites are gone. Appetite improves. Begin gentle refeeding with high quality, clean foods.
Day 15 to 21: Third dose if label recommends it. Skin and fins heal steadily. Watch for any new attachments. If any appear, reassess dosing, volume calculations, and filtration status.
At the end of treatment, reinstall carbon and turn on UV after a large water change. Continue observation for two more weeks.
Prevention That Actually Works
Quarantine Protocol for New Fish
- Quarantine every new fish for 4 to 6 weeks in a separate tank.
- Observe daily under bright light for threads, sores, or flashing.
- Optionally run a preventive round of a chitin inhibitor if the source is high risk, such as outdoor ponds or farms with known issues.
Plant and Equipment Hygiene
- Dip new plants in an alum solution or a dilute potassium permanganate bath before adding to your tank. Rinse well.
- Keep dedicated nets, buckets, and siphons for each system. Color code them to avoid mix-ups.
- Dry equipment completely between uses. Drying kills many aquatic parasites over time.
Feeding and Stocking Habits
- Avoid live foods collected outdoors. Use safe, cultured sources only.
- Do not overcrowd. Overcrowding increases stress and makes outbreaks worse.
- Keep up with filter maintenance and moderate feeding schedules to reduce organic waste.
Troubleshooting and FAQs
Will salt alone cure anchor worm
No. Salt supports healing and can help with stress and some free stages, but adults anchored in tissue usually persist without a targeted medication that stops the life cycle.
Why treat the whole tank if only one fish shows worms
Because larvae are microscopic and move through the water. If you do not treat the system, new attachments will appear on other fish after adults lay eggs.
Can anchor worm infect humans
No. It is a fish parasite. Still, wash hands after handling fish or tank water to avoid bacterial infections from open cuts.
Should I raise the temperature to speed up the cycle
Do not chase temperature. Many community fish handle only a narrow range. Use precise dosing at normal temperature and allow the schedule to work.
My fish still has one worm after treatment. What should I do
Try manual removal after the first or second dose when the parasite is weaker. If removal fails, continue the treatment schedule and let the cycle break. Focus on wound care and clean water.
How do I calculate tank volume for dosing
Measure the internal length, width, and water height to calculate liters or gallons. Subtract displacement from hardscape if it is heavy. When unsure, dose for slightly less than the estimated volume and adjust only if the label allows.
Is it safe to use antibiotics during parasite treatment
Use antibiotics only if you see clear signs of secondary infection. Prefer a hospital tank to protect the main biofilter. Do not mix medications unless the labels say it is safe.
Quick, Safe Step by Step Plan
Use this checklist to keep the process controlled and effective.
Day 0
- Confirm anchor worm visually.
- Test water and correct any ammonia or nitrite issues.
- Increase aeration. Clean substrate lightly.
- Remove carbon and turn off UV.
- Move shrimp and crayfish to a separate tank.
- Dose a diflubenzuron based product per label for the full system.
Day 1 to 3
- Observe fish. Do not overfeed.
- Optional: manual removal on larger fish if a parasite is clearly accessible. Dab the wound with antiseptic and return the fish to treated water.
Day 7
- Partial water change if the label instructs it.
- Redose per label to catch the next wave.
- Continue strong aeration and observation.
Day 14
- Third dose if recommended by the product.
- Assess wounds and appetite. Treat bacterial infections in a hospital tank if needed.
End of Course
- Large water change.
- Reinstall carbon and restart UV if you use it.
- Keep observing for two more weeks. No new threads should appear.
Common Mistakes to Avoid
- Plucking every worm on day one without system treatment. Larvae will simply reattach.
- Under-dosing due to guessed tank volume. Measure and calculate correctly.
- Mixing multiple medications at random. Stick to a plan and follow labels.
- Leaving carbon or chemical media in the filter. These remove active ingredients.
- Keeping shrimp in the tank during treatment. Move them to safety first.
- Stopping treatment early because fish look better. Finish the full schedule.
Aftercare and Long Term Health
Once parasites are gone, focus on healing and resilience:
- Feed small, frequent portions of high quality foods. Avoid fatty treats until fish regain weight.
- Keep nitrate low with regular water changes.
- Add gentle cover and reduce aggressive tankmates to lower stress.
- Resume normal filtration and maintenance schedules.
Document what happened. Note the source of new fish or plants, the timeline, and the treatment used. This record prevents repeated mistakes and speeds response next time.
Conclusion
Anchor worm is visible, stubborn, and dangerous if ignored. The cure is straightforward once you accept that you must break the life cycle in the water and protect fish during healing. Confirm the diagnosis, stabilize water, remove carbon, and use a proven chitin inhibitor across the entire system on a 7 day interval for at least two rounds. Add salt support if appropriate, remove worms manually only when safe, and treat secondary infections in a hospital tank. Quarantine new fish and dip new plants to keep this parasite out for good.
With a measured plan and consistent follow through, even a beginner can clear anchor worm and bring a tank or pond back to steady health. Stay patient, follow the schedule, and your fish will recover.