We are reader supported. When you purchase through links on our site, we may earn an affiliate commission. Also, as an Amazon affiliate, we earn from qualifying purchases.
A protein skimmer is one of the most effective tools for keeping saltwater aquariums stable and clean. It removes organic waste before it breaks down, helps with oxygen and pH, and keeps water clear. If you want healthier corals and fish with less algae and fewer water quality swings, learning how a skimmer works and how to run it well is worth your time. This guide explains what a protein skimmer is, how it works, which type to choose, and how to set it up, tune it, and maintain it without fuss.
What Is a Protein Skimmer
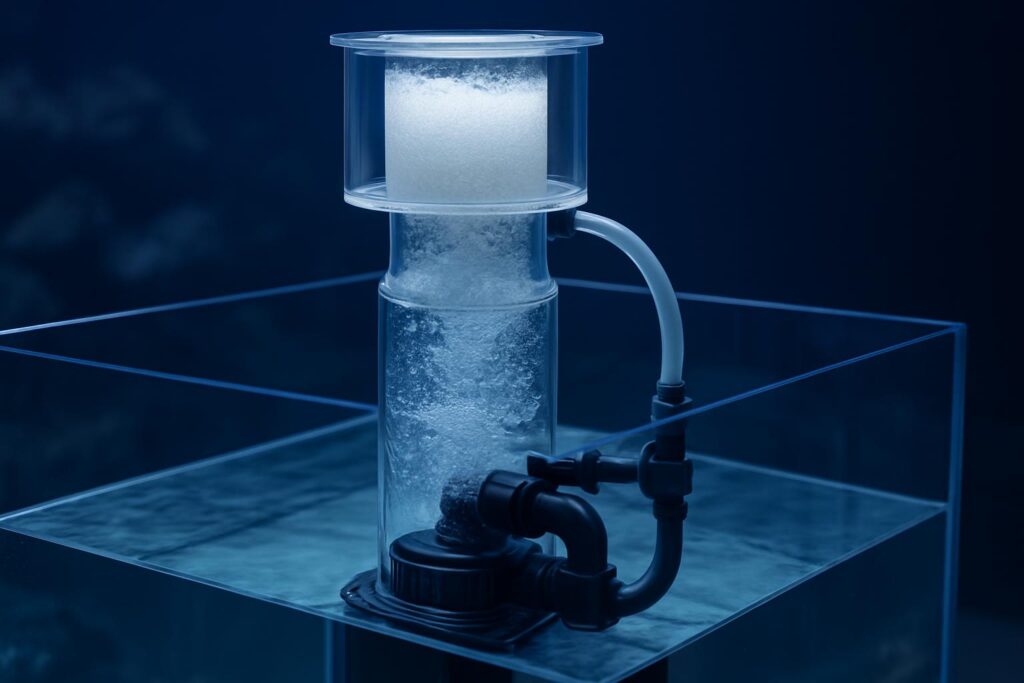
A protein skimmer is a device that uses air bubbles to pull out dissolved organic compounds from aquarium water. This process is called foam fractionation. The skimmer mixes water with fine bubbles. Waste molecules stick to the bubble surface, rise to the top as foam, and collect in a cup you can remove and clean. This removes proteins, fats, and other organics before they break down into ammonia, nitrate, and phosphate.
Most skimmers sit in a sump in a dedicated chamber with a stable water level. Some models hang on the back of the aquarium. Either way, the goal is the same. Create many small bubbles, give them time to contact the water, and collect the waste-rich foam.
Why Skimming Matters in Marine Aquariums
Marine tanks are often fed heavily, and live rock and corals release organics. Without export, these compounds break down and push nutrients higher over time. A skimmer reduces the load before it becomes a problem. That means clearer water, less yellow tint, and better light penetration to corals.
Skimmers also improve gas exchange. The air and water mixing adds oxygen and drives off excess carbon dioxide, which can support a higher and more stable pH. This supports coral calcification and overall fish health. In short, a good skimmer is a core part of a reef filtration system, working alongside mechanical filtration, chemical media, and biological filtration.
How a Protein Skimmer Works
Air meets water
The skimmer draws aquarium water and mixes it with air. This is done with a venturi injector, a needle wheel impeller, or an air stone that creates many microbubbles. The smaller and more numerous the bubbles, the higher the total surface area for waste to attach.
Contact, attach, and rise
As bubbles pass through the reaction chamber, organic molecules that are attracted to the air water interface adhere to the bubbles. With enough contact time and calm flow, a stable foam head forms and starts climbing the neck of the skimmer.
Foam collection cup
The dry foam at the top breaks and condenses into liquid waste called skimmate. It collects in a removable cup. This is the exported waste that no longer sits in the system. Emptying the cup physically removes these compounds from your aquarium.
Wet vs dry skimming
When the skimmer pulls more watery foam, this is wet skimming. It removes more volume but can reduce salinity faster and may include more plain water. Dry skimming produces thicker, darker skimmate and usually removes less water. You can tune your skimmer to aim for either target. Many reef keepers run a middle setting that is reliable and does not need constant attention.
Key Components You Should Recognize
Reaction chamber. The main body where bubbles and water mix. A taller chamber and a calm bubble column help build a stable foam head.
Pump and air intake. The pump moves water and often draws air through a venturi. The airline may have a silencer to reduce noise.
Needle wheel or mesh wheel impeller. On many models, this chops incoming air into fine bubbles for higher surface area.
Bubble plate or diffuser. This spreads flow to reduce turbulence and microbubbles escaping.
Neck and collection cup. The neck guides the foam upward. The cup holds skimmate and may have a drain for external collection.
Outlet and water level control. A gate valve or pipe sets the water height in the skimmer, which controls how high the foam rises.
Common Skimmer Types
In sump skimmers
These sit in a sump and are the most popular choice for reef tanks. They are stable, offer good performance, and often run quieter. They require a sump section with a constant water level.
Hang on back skimmers
HOB models hang on the aquarium or sump wall and can work well for small systems without a sump. They save space in the tank but may be louder and harder to tune on tanks with variable water levels.
Air stone driven skimmers
These use a high quality wooden air stone to create fine bubbles. Maintenance includes regular stone replacement. They are simple but usually used on small tanks or specialized setups.
Venturi and needle wheel skimmers
This is the standard modern design. A venturi injects air, and a needle wheel chops it into microbubbles. They balance efficiency, performance, and maintenance ease.
Recirculating and external skimmers
Recirculating skimmers have a dedicated pump that recirculates water within the body while a feed pump supplies water from the sump. They are flexible to tune and can be installed externally, but they need careful plumbing and leak prevention.
Downdraft and Beckett skimmers
These force high flow through injectors to create foam. They can handle heavy bioloads but often use more power and space. They are less common for home tanks today.
Do You Need One for Freshwater Tanks
Most freshwater tanks do not use protein skimmers. Freshwater chemistry makes foam fractionation far less efficient, so the skimmer removes little. Standard mechanical filtration, biological media, and regular water changes work better. For saltwater and reef systems, a skimmer is close to essential.
Sizing a Skimmer the Right Way
Match the skimmer to your tank volume and bioload. Manufacturer ratings are a starting point, but they can be optimistic. Consider your feeding level and whether you keep corals that need clean water. Choose a model with a realistic rating near your water volume, or one size up if you feed heavily.
Pay attention to neck diameter. A very large neck needs a strong, dense foam head to climb and will underperform on a lightly stocked tank. A properly sized neck builds a stable foam head more reliably.
Check air draw and pump quality. More air is not always better if the body design is not matched. Balanced air and water flow, smooth bubble movement, and a calm neck are what you want.
Review footprint and required water depth. Make sure it fits your sump chamber and that the chamber level matches the recommended depth. If needed, use a skimmer stand to raise the unit.
Installation and First Setup
Place the skimmer in a sump chamber with a constant water level, ideally controlled by baffles or an auto top off. Check the recommended water depth from the maker and set the skimmer on a stand if needed.
Assemble the skimmer body, pump, and cup. Ensure the airline and silencer are dry and free of salt creep. Verify that the pump impeller spins freely and that the venturi connection is tight.
Open the air intake and start the skimmer with the outlet valve open enough to prevent overflowing. Let it run for several hours and observe the foam head. Bring the internal water level up slowly using the outlet valve until foam rises to the base of the neck. Do not chase small changes during the first days.
Allow a break in period. New skimmers often take one to three weeks to build a stable biofilm that supports consistent foam. During this time, performance can vary. Be patient and avoid major adjustments unless the skimmer overflows.
If your cup has a drain, route it to a container with enough capacity in case the skimmer surges. This prevents spills and saltwater damage around the stand.
Daily Tuning for Consistent Results
Set the foam line at the bottom of the collection cup. Adjust one control at a time. First, set water level with the outlet valve. Then fine tune air intake if your model allows. More air usually creates lighter, wetter foam; less air tends to make drier foam.
Check the skimmer after feeding or dosing. Oils from food and additives can collapse or overdrive the foam temporarily. Avoid over adjusting. Give it time to stabilize after changes.
Choose your goal. For nutrient export and clarity, a medium wet setting is reliable. For maximal export, skim wetter and empty the cup more often. For minimal impact on salinity, skim drier and expect darker, thicker skimmate with slower fill times.
Routine Maintenance
Empty and rinse the collection cup and neck weekly or as needed. A clean neck lets foam climb better and keeps performance stable. Avoid using soap. Warm water and a sponge are enough.
Inspect the airline and silencer weekly. Remove salt creep and salt crystals that restrict air draw. If your model has an ozone port, keep it sealed when not in use.
Every one to three months, clean the pump and impeller. Soak parts in a mild vinegar solution to dissolve calcium buildup, rinse well, and reassemble. Check O rings and gaskets and apply a thin coat of aquarium safe lubricant if needed.
For air stone models, replace the wooden stone on the schedule recommended by the manufacturer to keep bubble size fine and consistent.
Troubleshooting Common Issues
Skimmer overflowing
Causes include additives like water conditioners, epoxy putty, or certain foods. New filter socks and oils from your hands can also cause surges. Lower the water level in the skimmer, restrict air slightly, or temporarily raise the cup. In some cases, turn off the skimmer for a few hours and run fresh carbon to absorb the cause. Use the cup drain to an external container to catch any overflow.
Weak or no foam
Allow time for break in after cleaning or after installing a new skimmer. Confirm the water depth is within spec. Check for salt creep in the airline and venturi. Clean the pump and impeller to restore air draw. Avoid oversizing the skimmer if your tank has a very light bioload, since a large neck may never build a stable foam head.
Microbubbles in the display
Ensure the skimmer outlet is before a bubble trap in the sump. Add a sponge or fine filter pad after the outlet temporarily. Check that the water level in the sump is not too low, which can cause splashing and bubbles to escape. During break in, microbubbles are common and often fade within days.
Noise
Seat the skimmer on a soft mat to reduce vibration. Clean the air silencer and airline. Make sure the pump is not touching sump walls. If the impeller or volute has debris or calcium buildup, clean them to restore smooth operation.
When to Run or Pause a Skimmer
Most systems run a skimmer 24 hours a day. You can pause it briefly during medication, after using water conditioners, or when applying epoxy or coral food that triggers overflowing. Keep the display well aerated if the skimmer is off. Resume normal operation after the water clears, and be ready to lower the water level in the skimmer at restart to prevent a surge.
How a Skimmer Fits with Other Filtration
A skimmer does not replace mechanical filters, carbon, or a refugium. Filter socks trap particles. Activated carbon clears color and adsorbs chemicals. A refugium can absorb nutrients biologically. The skimmer pulls out dissolved organics early in the chain and boosts gas exchange. Used together, these tools give more stable results than any one method alone.
pH and Outside Air Options
By pulling in fresh air and mixing it with water, a skimmer helps strip carbon dioxide and can support a higher pH. If the room has high CO2, you can route the skimmer air intake to outside air or to a CO2 scrubber connected to the skimmer intake. Monitor pH and observe livestock responses when making changes.
Energy Use, Cost, and Reliability
Modern needle wheel skimmers are efficient and quiet. Check the pump wattage and expected air draw when you compare models. Choose a reputable pump, because stable air and water flow matter for skimming consistency. Spending a bit more upfront on a reliable design and pump often saves time and energy later.
Tips for Nano and Small Tanks
On very small saltwater tanks, frequent water changes and careful feeding can work without a skimmer. If you want the extra buffer and cleaner water, choose a compact hang on back or in chamber model sized for your tank volume. Keep expectations realistic. Small skimmers produce less foam and may need more frequent tuning, but they still help with clarity and stability.
A Quick Setup Checklist
Place the skimmer in a stable water depth. Ensure the airline is clear and the pump is clean. Start with the outlet valve set for a low internal water level. Open air intake. Raise the water level slowly until foam reaches the base of the neck. Allow one to three weeks for break in. Clean the cup weekly. Deep clean the pump every one to three months. Adjust after feeding or dosing only if needed.
Conclusion
A protein skimmer removes dissolved organic waste, supports oxygen and pH, and keeps reef tanks clearer and more stable. It works by creating a dense cloud of microbubbles, letting organic molecules attach, and exporting them as collected foam. Choose a design and size matched to your tank and bioload. Set it in a stable water depth, tune the water level and air, and allow time for break in. Keep the neck and pump clean for consistent results. Used with good husbandry, a skimmer reduces maintenance and helps fish and corals thrive.
FAQ
What does a protein skimmer remove?
A protein skimmer removes dissolved organic compounds such as proteins, fats, surfactants, and food waste before they break down into ammonia, nitrate, and phosphate. This improves water clarity, reduces yellowing, and supports better oxygen and pH stability.
Do I need a protein skimmer for a freshwater aquarium?
Most freshwater tanks do not need a protein skimmer because foam fractionation is far less efficient in freshwater. Standard mechanical filtration and regular water changes work better. For saltwater and reef systems, a skimmer is close to essential.
How should I size a protein skimmer for my tank?
Match the skimmer to your tank volume and feeding level. Use manufacturer ratings as a starting point and consider choosing a model near your actual water volume, or one size up if you feed heavily. Avoid oversizing with a very large neck on a lightly stocked tank because it may not build a stable foam head.
How do I set up and tune a protein skimmer?
Place the skimmer in a sump chamber with a constant water level, assemble it, and start with a low internal water level. Open the air intake and raise the internal water level slowly until foam reaches the base of the neck. Allow a one to three week break in period, then fine tune for wet or dry skimming and clean the cup and neck regularly.
Why is my protein skimmer overflowing or not producing foam?
Additives, epoxy, water conditioners, new filter socks, or oils from hands can cause overflowing or collapse foam. During break in, performance is unstable. Check water depth, airline salt creep, and a clean pump and impeller. Lower the internal water level or restrict air temporarily, or pause the skimmer until the cause clears.