We are reader supported. When you purchase through links on our site, we may earn an affiliate commission. Also, as an Amazon affiliate, we earn from qualifying purchases.
Breeding betta fish at home is achievable when you prepare well, stay patient, and follow a clear plan. This guide walks you from setup to raising juveniles, with practical steps and realistic expectations. Read through once, gather your gear, then move step by step. You will avoid common mistakes, protect your fish, and improve your success rate.
What Breeding Betta Fish Involves
Breeding bettas is more than pairing two pretty fish. One spawn can produce dozens or even hundreds of fry. You will need daily time for feeding and water changes, spare tanks or jars for separating juveniles, and a plan for placing fish in new homes. If you cannot commit time and space for at least three months, pause and prepare first.
Healthy parents, a stable environment, and clean water are the foundation. The rest is timing, observation, and small adjustments.
Gear and Setup Checklist
Tanks and Layout
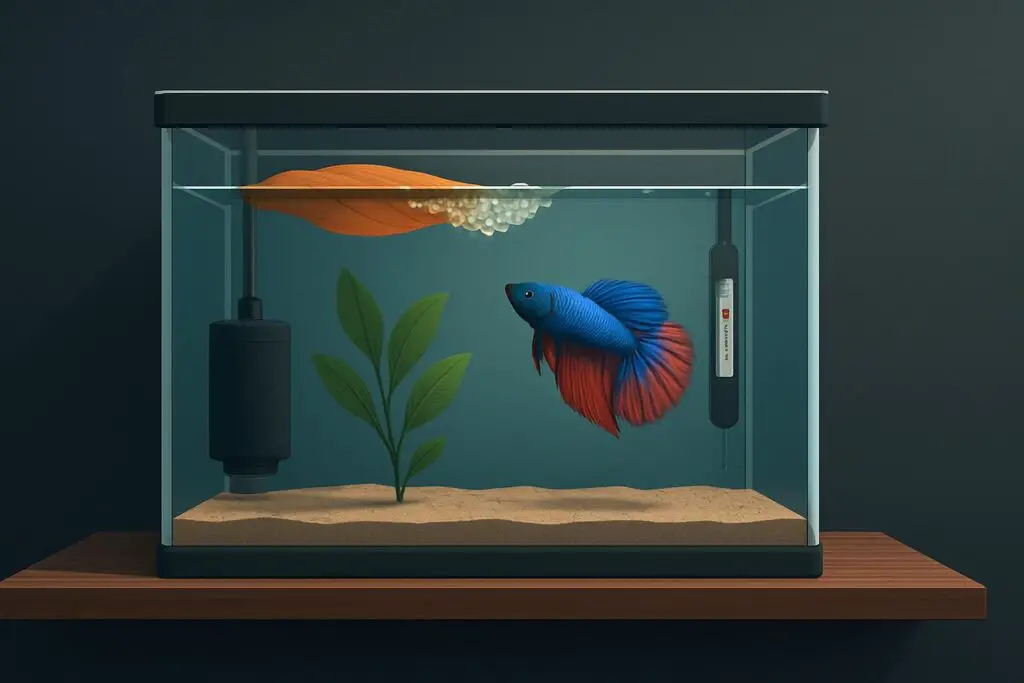
Use a dedicated breeding tank with no gravel. A 10 gallon tank works well, but you will only fill it shallowly at first. You also need a grow-out tank for juveniles, ideally 20 gallons or larger, plus containers or jars for separating males later. Transparent dividers or a breeding chimney help introduce the pair safely.
Filtration, Heat, and Lid
Run a mature sponge filter with a gentle flow. Add a reliable heater and a thermometer. Target warm, stable water with minimal surface movement to protect the bubble nest. Always keep a tight lid to maintain warm, humid air above the water.
Water Parameters That Support Spawning
Aim for 78 to 80 F in most cases. For breeding, many keepers nudge temperature to the warmer end for a short period. Soft to moderately hard water is fine. A practical range is pH 6.5 to 7.5 with low to moderate hardness. Ammonia and nitrite must be 0, and nitrate should stay under 20 ppm. Pre-cycle your sponge filter and avoid drastic changes once the pair is introduced.
Decor and Nest Support
Keep decor simple. Add live or silk plants and a few hiding spots for the female. Include a broad floating leaf or Indian almond leaf to anchor the bubble nest and add beneficial tannins. Dim lighting helps calm fish and encourages spawning behavior.
Live Food Cultures to Start Early
Begin cultures well before spawning. Prepare infusoria, microworms, and baby brine shrimp. These foods help you feed fry of different sizes as they grow. Dry foods are useful later, but early success depends on tiny live foods that trigger feeding responses and do not foul water too quickly.
Handy Tools
Gather airline tubing, an air valve, a turkey baster for spot cleaning, soft nets, water conditioner, water test kits, and a small flashlight for quick checks. Keep a log for dates, temperatures, and observations. Simple records prevent confusion when you manage multiple steps.
Choosing and Conditioning Your Pair
Age and Health
Choose a male and female in their prime, often between four and twelve months. Look for clear eyes, full fins, steady movement, and a good appetite. Avoid fish with frayed fins, sores, clamped fins, or heavy bloating. A strong parent pair raises your odds more than any gadget.
Temperament and Readiness
House the pair separately where they can see each other through a divider. You want alert but controlled interest, not nonstop attacking. Signs of readiness include a male that starts to build bubble nests and a female showing a white ovipositor and sometimes vertical breeding bars. If either fish is frantic or hides constantly, spend more days conditioning.
Conditioning Diet and Care
Condition both fish for 10 to 14 days before introducing them. Offer small, frequent, high-protein meals such as frozen or live foods and quality pellets. Alternate foods to support a complete diet. Keep the tank clean and do extra water changes during this stage. One light fasting day per week helps prevent bloating.
Quarantine and Disease Check
Quarantine new fish for at least two weeks before breeding attempts. Clear parasites and infections early. A single unnoticed issue can ruin a spawn or harm both adults.
Prepare the Breeding Tank
Water Depth, Heat, and Calm
Set up the breeding tank in a quiet spot. The breeding tank should be filled to a depth of 5 to 8 inches. Add an Indian almond leaf to tint the water and a broad leaf or raft for nest building. Keep the sponge filter off or on the lowest setting during courtship so the surface stays calm. Set the breeding tank to 80 F during spawning.
Introduce the Male First
Release the male into the breeding tank and allow him to claim the space and start a bubble nest. Add the female in a clear chimney or behind a secure divider so they can see each other but not make contact. Give them time. Watch for a steady nest and measured interest from both fish.
Spawning Day: What to Watch For
Courtship and Release
When the male has a stable nest and the female is receptive, gently release the female. Expect chasing and displays but not relentless damage. Provide cover so the female can retreat. If aggression is extreme or fins tear quickly, separate them and try again later or with a different partner.
The Embrace and Egg Collection
During spawning, the male and female wrap in an embrace. Eggs fall, and the male collects them and places them in the bubble nest. This can repeat many times over minutes to hours. Stay hands off. Keep the room calm, lights dim, and the lid on. Do not feed during spawning.
When to Remove the Female
Once spawning slows and the male starts guarding the nest, gently remove the female to her recovery tank. Remove the female immediately after spawning is complete. Clean, warm water and a few days of rest are enough for her to bounce back if she is uninjured.
Egg and Fry Care
Hatching Timeline and Father Care
Eggs typically hatch in 24 to 48 hours depending on temperature. Fry hang from the nest as wigglers and absorb their yolk sacs for another one to two days. The male will catch falling fry and return them to the nest during this stage. Keep the tank quiet and avoid vibrations.
When to Remove the Male
When fry become free swimming and leave the nest, fatherly care ends. Remove the male when the fry become free swimming. Feed him and let him rest in a separate tank. Leaving him too long raises the risk of him snacking on the fry.
First Foods and Feeding Rhythm
Start with infusoria for the smallest fry, then offer microworms and newly hatched baby brine shrimp. Feed tiny portions three to five times a day. Watch bellies to judge intake. You want full but not bloated fry and minimal food settling on the bottom. Increase food size as mouths grow. Add a small night feeding if fry appear thin by morning.
Water Changes and Gentle Filtration
Restart the sponge filter at the lowest flow once fry are swimming strongly. Perform daily 10 to 20 percent water changes with pre-warmed, aged water. Use a narrow airline tube or a turkey baster to remove debris without sucking up fry. Slowly raise water depth over weeks as the fry grow.
Light, Lid, and Air Above Water
Keep light low to moderate. Maintain a stable, warm room and a tight lid. Warm, humid air above the water helps the developing labyrinth organ. Avoid cold drafts and sudden changes.
Growing Out and Sorting Juveniles
Moving to a Larger Space
At around three to four weeks, or when the tank looks crowded, move the group to a clean and cycled grow-out tank. Keep temperature near 80 F. Raise food volume gradually, clean more often, and watch the smallest fry so they are not outcompeted.
Feeding as They Grow
Continue baby brine shrimp through week four or longer while introducing finely crushed pellets or high-quality powdered fry food. Transition over one to two weeks as you confirm they accept dry foods. Small, regular meals are better than large feedings that bloat fish and spike waste.
Separating Aggressive Fish
As hormones rise, nips and chases increase. At six to eight weeks, start separating maturing males and any aggressive females into individual containers or compartments with visual barriers. Keep water warm and clean. Frequent small water changes are essential when fish are jarred.
Health Checks
Look for clamped fins, flashing, white spots, or dusty gold sheen that may suggest parasites. Most early problems improve with clean water, stable heat, and careful feeding. Remove weak fish to a hospital container if needed so the main group stays stable.
Planning Homes and Responsible Breeding
Be Ready Before You Spawn
Make a placement plan before pairing the fish. Contact local shops, clubs, and hobbyists. Budget for food, heaters, filters, jars, and water tests. Avoid back-to-back spawns. Give parents recovery time, and only repeat if you have space for another group. Responsible breeding protects your fish and your time.
Troubleshooting Common Problems
Male Not Building a Nest
Increase warmth, reduce surface movement, dim the lights, and add a fresh almond leaf or a floating raft. Ensure the lid is tight and the room is quiet. If nothing changes after a few days, try a different pairing or recondition the same pair longer.
Pair Too Aggressive
Use more cover, lengthen conditioning, and introduce with a chimney for an extra day. If injuries occur quickly or one fish hides nonstop, stop the attempt. Heal both fish and reassess with a safer partner.
Eggs Fungus or Disappear
Unfertilized eggs turn white and may fungus. Good water quality, calm surface, and a healthy male reduce losses. Tannins from almond leaves help. It is normal to lose some eggs or fry in early attempts.
Fry Die-Offs
Common causes are overfeeding, dirty water, strong flow, or cold air above the water. Cut feeding amounts, increase small water changes, lower filter output, and make sure the lid holds warm, moist air. Review your log and adjust one factor at a time.
Step-by-Step Quick Timeline
Days 1 to 14: Conditioning
House adults separately, feed high-protein meals, keep water very clean, and watch for signs of readiness. Build food cultures and prep the breeding tank.
Day 15: Setup and Introduction
Fill the breeding tank shallowly, warm it, add almond leaves and nest support, release the male, and place the female in a chimney. Confirm steady nest building.
Day 16 to 17: Spawning
Release the female, monitor carefully, allow the embrace and egg collection, then remove the female as soon as spawning ends. Keep the room calm and the tank covered.
Day 18 to 20: Hatch
Eggs hatch into wigglers. The male tends the nest. Do not feed yet. Maintain stable heat and still water.
Day 21 to 28: Free Swimming
Remove the male when fry are free swimming. Begin tiny live foods several times daily, start gentle filtration, and perform daily small water changes.
Week 4 onward: Grow-Out
Move to a larger tank as needed, increase feeding volume, introduce crushed pellets, and start separating aggressive juveniles. Keep records and plan placements.
Conclusion
Success with home betta breeding comes from preparation, patient observation, and strict water care. Choose healthy parents, set stable conditions, feed the right foods at the right times, and act early when problems appear. Follow this plan, refine your timing with notes, and you will raise strong fry and learn with each spawn.
FAQ
Q: What water depth should I use in the breeding tank
A: The breeding tank should be filled to a depth of 5 to 8 inches.
Q: What temperature should I keep the breeding tank during spawning
A: Set the breeding tank to 80 F during spawning.
Q: When should I remove the female and the male
A: Remove the female immediately after spawning is complete. Remove the male when the fry become free swimming.
Q: What should I feed the fry first
A: Start with infusoria for the smallest fry, then offer microworms and newly hatched baby brine shrimp.
Q: How often should I change water for young fry
A: Perform daily 10 to 20 percent water changes with pre-warmed, aged water.