We are reader supported. When you purchase through links on our site, we may earn an affiliate commission. Also, as an Amazon affiliate, we earn from qualifying purchases.
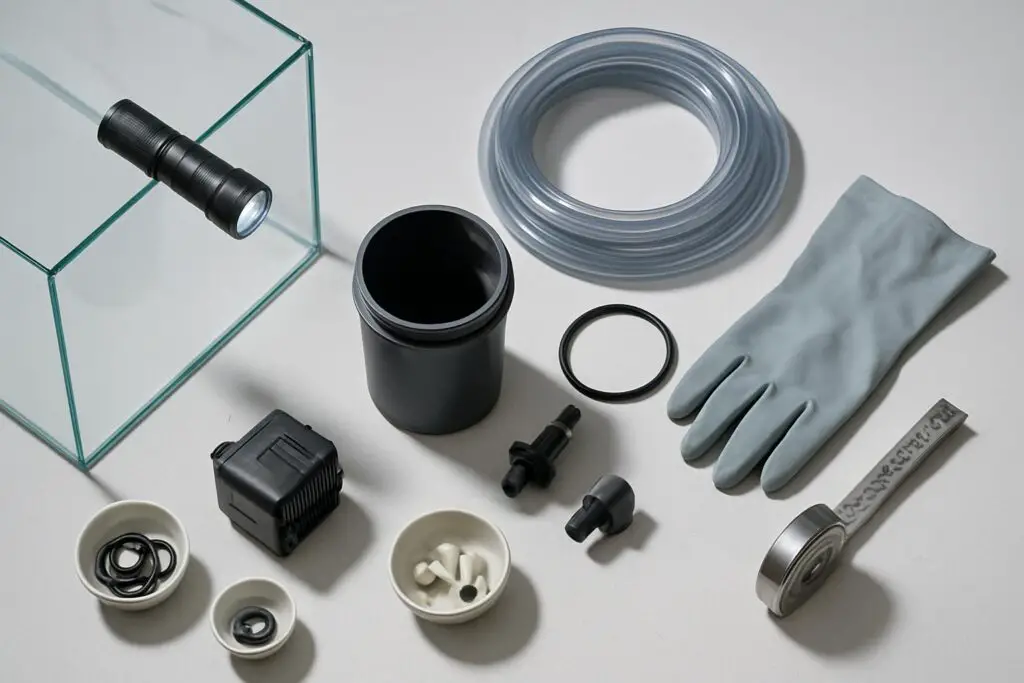
Buying second-hand aquarium gear can save real money and help you build a better setup faster. It can also expose you to leaks, electrical hazards, pests, and parts that are impossible to replace. Go in with a plan. Know what to check, what to avoid, what to clean, and what a fair price looks like. This guide walks you through each step so you can buy safely, avoid surprises, and get your tank running smoothly.
Introduction
Used aquarium gear is everywhere. Hobbyists upgrade, move, or break down tanks, and their equipment hits classifieds and marketplace listings. Some of it is barely used and a bargain. Some of it is a project you do not want. The difference is in the details you inspect before paying and how you clean and test after you bring it home.
You will learn how to evaluate tanks, stands, filters, pumps, heaters, lights, skimmers, CO2 systems, and RO units. You will also learn how to spot red flags, negotiate, disinfect properly, and move gear without damage. Use this as a checklist before you click buy.
Start With a Plan
Define what you actually need
Match the gear to your tank size and livestock plan. Oversized filters and pumps are fine if you can tune flow. Undersized equipment often costs more in upgrades later. Confirm dimensions so everything fits your stand and cabinet.
Research the model first
Look up the exact brand and model number. Check whether parts like impellers, seals, O-rings, drivers, and baskets are still available. Confirm the manufacturer supports it. Avoid obscure models with no parts listings or discontinued controllers that fail without replacements.
Set a price ceiling
As a general rule, aim for 30 to 60 percent of the new price depending on age, condition, and included parts. Pay more only for recent models with receipts or transferable warranty. If a seller refuses basic tests, walk away.
Biosecurity and Safety First
Assume contamination until proven clean
Used gear can carry disease, algae, snails, pests, or copper residues. Plan to disinfect anything that touched water. Replace porous items you cannot reliably sterilize, such as used sponges, old biomedia, and unknown rocks or substrates.
Electrical safety is not optional
Check every cord and plug for cracks, cuts, stiffness, or heat damage. Look for burn marks on housings. Verify the voltage matches your region. Make drip loops on all cords and run gear on a GFCI-protected outlet. Never use damaged cords or taped repairs.
Inspecting the Tank
Glass seams and silicone
Run a bright light along all seams. Look for bubbles inside the silicone, separation, or salt creep trails that hint at prior leaks. Press gently along the inner bead to confirm it is intact. Minor cosmetic haze is fine. Lifted or missing silicone is not.
Chips, scratches, and bowing
Small edge chips on non-load-bearing corners are usually cosmetic. Deep chips near seams or cracks are a deal-breaker. Check for permanent bowing on longer panels by sighting along the glass. Acrylic should be free of deep gouges that cannot be polished out.
Bracing and rims
Center braces must be flat, clear of cracks, and firmly bonded. Rims should sit tight with no gaps. Missing braces are risky, especially on larger tanks.
Stand and leveling
The stand must be flat, rigid, and free from water damage. Press on corners and watch for wobble. Soft spots, swelling, or rot will cause stress on the tank and lead to failure.
How to wet test a used tank
Place the tank level on a stand outdoors or in a garage. Fill it with tap water. Run a perimeter of paper towels under the bottom trim to catch seepage. Let it sit for 24 hours. Any dampness or sweating seams is a fail. Drain and dry fully before moving it inside.
Stands and Cabinets
Structure and hardware
Open the cabinet and check all joints, screws, and hinges. Doors should close cleanly and support should be continuous under the tank edges. Replace swollen particle board and rusted hardware. Confirm you can access filters and plumbing once installed.
Filters: HOB, Canister, Internal, and Sumps
Housing and seals
Inspect housings for cracks, especially around hose barbs and latches. For canisters, check the main O-ring for flattening or nicks. Verify taps and quick-disconnects move freely and do not drip under light pressure.
Impellers and magnets
Open the motor block and remove the impeller. Look for swollen magnets, worn shafts, or chipped blades. Spin the impeller with a finger. It should turn smoothly with light magnetic resistance.
Startup and noise
Prime the filter and plug it into a GFCI. It should start promptly without rattling. Brief startup rattle is normal, persistent grinding is not. Any leak around the lid or taps needs an O-ring or is a hard pass if parts are unavailable.
Media and baskets
Expect to replace all media. Old sponges and bio rings can carry pathogens and are often clogged. Check that baskets and dividers are present and undamaged so flow is correct.
Pumps, Wavemakers, and Air Pumps
Powerheads and wavemakers
Inspect cord strain reliefs and magnets. Mounts should hold firm. Run them in a bucket. Noise should be minimal once water-filled. If it only starts when tapped, the impeller or controller is failing.
Return pumps
Verify flow by timing how fast a known volume moves. Check for microbubbles indicating a loose fitting on the suction side. Seals should be dry. A warm pump is normal; a hot housing or burnt odor is not.
Air pumps
Listen for consistent hum and feel for strong output. Replace old tubing and check valves. Diaphragms are consumables but should be available for common models.
Heaters
Risk profile
Heaters are a common failure point. Many hobbyists choose to buy heaters new due to failure risk. If you consider used, be cautious and test thoroughly.
Testing a used heater
Submerge the heater in a bucket with a separate thermometer. Set a temperature and watch for accurate cycling. Confirm it shuts off at set point. Any fluctuation, stuck-on behavior, or condensation inside the tube is a fail.
Controllers and redundancy
If the heater has an external controller, confirm the probe reads correctly and the relay clicks cleanly. Plan a secondary safety such as a standalone temperature controller for long-term use.
Lights
LED fixtures
Check for salt creep inside lenses, flicker, dead zones, and noisy fans. Drivers should not overheat. Ask hours of use if possible. Mounting arms and hanging kits should be complete and sturdy.
Fluorescent fixtures
Inspect end caps for corrosion and test with fresh bulbs if included. Ballasts should start reliably and not buzz loudly. Factor the ongoing cost of bulbs.
Skimmers for Marine Tanks
Body and cup
Look for hairline cracks around the neck and cup. Verify the drain fitting seals. Bubble plates and diffusers should be intact.
Pump and venturi
Run the pump in saltwater if possible to check foam. The needle wheel should be undamaged. Air intake lines should be clear and not brittle. A silent pump with stable foam head is a good sign.
CO2 Systems for Planted Tanks
Cylinders
Check the hydrotest date. If it is out of date, refills may be refused until re-certified. Inspect the valve threads and o-ring seat. Dents or deep rust are a pass.
Regulators and solenoids
Attach to a cylinder and pressurize in a safe area. The working pressure should hold steady. Set a low bubble rate and confirm it does not drift. Solenoids should open and close cleanly without overheating.
Leak checks
Brush soapy water on all joints and watch for bubbles. Replace any cracked bubble counters or check valves. Use new tubing if it has gone stiff or cloudy.
RO and RODI Units
Canisters and brackets
Inspect housings for cracks and threads for cross-bite. Check the bracket for bends. Leaks at high pressure are costly and messy.
Membranes and resin
Expect to replace prefilters and resin. Use a TDS meter to confirm output quality once installed. Old membranes with poor rejection are common in used units.
Test Kits and Meters
Reagents
Check expiry dates. Reagents degrade and give false readings. For reliability, plan to buy new test kits even if a used bundle includes them.
Digital meters
pH pens and TDS meters can be fine if they calibrate correctly and probes are not dried out. Factor in the cost of calibration solutions and replacement probes.
Hoses, Lids, Decor, and Substrates
Hoses and plumbing
Replace old vinyl tubing that is brown or stiff. Check bulkheads, unions, and O-rings. If threads are chewed or gaskets flattened, replace them.
Lids and covers
Glass lids should be flat with intact hinges and clips. Acrylic lids should not be warped. Mesh tops should have tight screens and complete frames.
Rocks, wood, and substrate
Unknown rocks and substrate can carry copper or pests. For beginners, avoid used porous materials from unknown systems. Choose new inert decor and substrate to reduce risk.
Red Flags to Walk Away
Seller behavior
Refusal to demonstrate basic functions is a strong warning. Vague answers about age or usage indicate risk.
Condition issues
Strong smoke smell, heavy salt creep inside electronics, spliced or taped cords, swollen impeller magnets, or melted plastic are immediate fails.
Missing critical parts
Absent power supplies, proprietary cables, seals, or mounting hardware can turn a bargain into a dead end. Confirm everything you need is present or available to buy.
Cleaning and Disinfection
Gross clean first
Remove debris and old media. Scrape algae and rinse off slime. Do not reuse old sponges or biomedia unless you fully trust the source and accept the biosecurity risk.
Descale and degrease
Use white vinegar to dissolve mineral scale on hard surfaces. Rinse well. Avoid soaking motor blocks or electronics in vinegar baths.
Disinfect effectively
Soak non-metal, non-electronic parts in a 1 to 20 bleach solution for 15 to 20 minutes. Rinse thoroughly, use dechlorinator, and air dry completely. Avoid bleach contact with metal parts and do not soak electronics. For items that cannot be bleached, use hydrogen peroxide on contact surfaces and allow full dry time.
Drying matters
Drying helps kill remaining pathogens. Allow at least 24 to 48 hours of dry time after disinfection before first use.
On-Site Testing Before You Pay
Power-on check
Whenever possible, plug gear into a GFCI at the pickup location. Watch for smooth startup, quiet running, and no burnt odor. Cycle heaters and lights. Prime filters and check for drips. Confirm buttons and dials respond.
Ask for a wet test for tanks and canisters
A 24-hour wet test for tanks is ideal. For canisters, at least a quick bucket test can reveal leaks. If time does not allow, negotiate a lower price or skip the purchase.
Negotiation and Payment
Use facts to set value
Share current new prices and the cost of likely replacement parts such as impellers, O-rings, bulbs, or media. Price at 30 to 60 percent of new based on condition and age. Offer more only when the model is recent and complete.
Avoid bundle traps
Large bundles often include items you do not need. Ask for line-item pricing and buy only what makes sense for your system. Do not let an unwanted stand or decor inflate the deal.
Receipts and serials
Ask for receipts, boxes, or serial numbers when available. This helps with support and confirms authenticity.
Transport Without Damage
Moving the tank
Never move a tank with water inside. Lift from the bottom with two people. Use blankets and foam under the tank in the vehicle. Keep it upright and avoid pressure on rims or braces.
Protecting gear
Remove fragile parts like skimmer cups and light mounts. Bag screws and small parts. Keep pumps and filters upright to avoid residual water spilling into motors.
When to Buy New Instead
High-risk categories
Consider buying new heaters and test kits due to failure and accuracy risks. Buy new suction cups, tubing, and media as they degrade or harbor pests.
Consumables and cheap parts
Replace bulbs, O-rings, seals, and impellers on used gear if age is unknown. The small investment restores performance and prevents leaks.
Simple Setup Flow After Purchase
Plan, inspect, test, clean, quarantine, install
Inspect everything at home. Test electrically and wet where appropriate. Clean and disinfect. Quarantine used wet items away from your display during testing. Install only after you are confident it is safe.
Conclusion
Second-hand aquarium gear can be a smart way to stretch your budget and upgrade your system. The key is clear standards. Identify the right model, inspect the critical points, test before paying, disinfect thoroughly, and price fairly. Walk away from red flags. Spend a little extra on new parts where it matters. With a methodical approach, you get reliable equipment and avoid the headaches that send savings down the drain.
FAQ
Q: What is the quickest safety check before buying any used electrical aquarium gear?
A: Plug it into a GFCI outlet, watch for smooth startup and quiet running, and inspect the power cord and plug for cracks, kinks, or heat damage.
Q: Should I buy used aquarium heaters?
A: Only if you can test them in a bucket with a separate thermometer and they pass calibration and shutoff checks; many hobbyists choose to buy heaters new due to failure risk.
Q: How do I wet test a used tank?
A: Place it level on a stand, fill outdoors or in a garage, run a perimeter of paper towels under the bottom trim, and let it sit for 24 hours to confirm no leaks or sweating seams.
Q: What makes a fair price for second-hand aquarium gear?
A: Aim for 30 to 60 percent of the new price depending on age, condition, and included parts; pay more only for recent models with receipts and transferable warranty.
Q: How should I disinfect used gear to avoid disease?
A: Remove debris, soak non-metal parts in a 1 to 20 bleach solution for 15 to 20 minutes, rinse well, dechlorinate, and air dry completely; avoid bleach on metals and electronics.