
We are reader supported. When you purchase through links on our site, we may earn an affiliate commission. Also, as an Amazon affiliate, we earn from qualifying purchases.
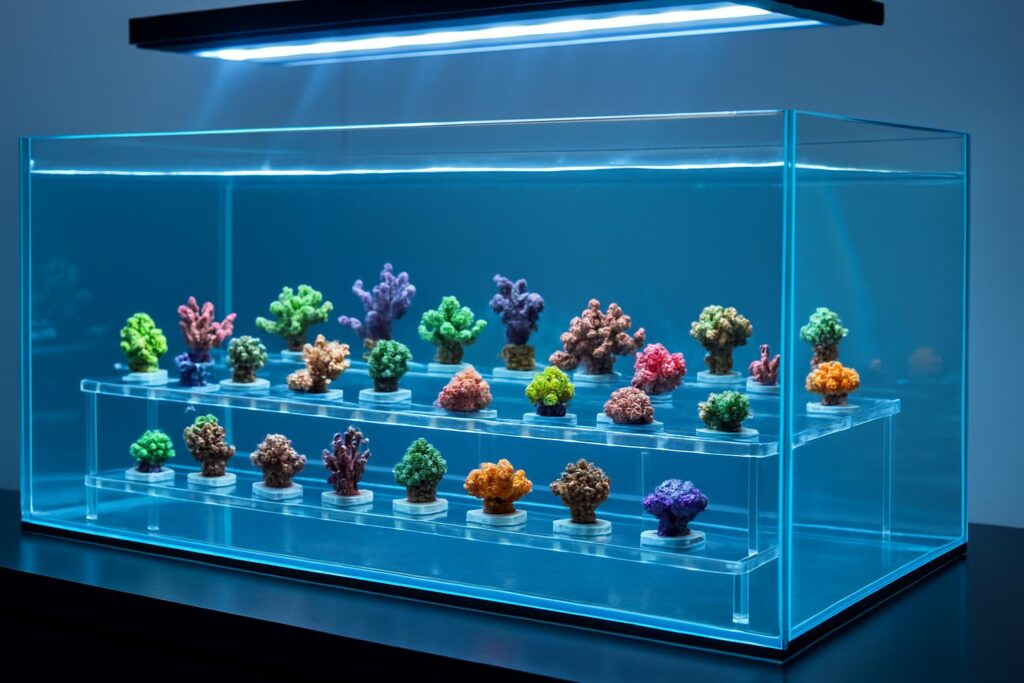
Frag tanks accelerate coral grow-out by giving you stable water, clean flow patterns, and uniform light coverage in a shallow footprint. A good frag system is easy to maintain, modular, and safe for constant hands-in work. The best choices balance simplicity with room to scale, so you can focus on healthy tissue extension, coloration, and quick healing after cuts.
What to look for in a frag tank for 2026
In 2026 the fundamentals have not changed. Shallow display depth improves PAR consistency and reduces shadowing. A wide footprint lets you spread frags for airflow and light. Rear-chamber AIO designs simplify plumbing and reduce salt creep, while bare-bones rimless glass gives maximum flexibility for custom gear. Pick based on your space, growth goals, and whether you prefer plug-and-play or DIY.
Key selection criteria
Shallow footprint: Helps you hit target PAR with fewer hotspots and easier maintenance.
Clean rear filtration or sump-ready: Stable export of nutrients with minimal noise and risk.
Build quality: Low-iron glass or clear acrylic, true edges, level mat, reliable seals.
Upgrade path: Space for a real light, room for dosing, racks, and cable management.
Serviceability: Hands in often. Look for scratch resistance, easy chamber access, and removable lids.
Top 4 frag tanks for coral grow-out in 2026
1) Fiji Cube 22 Gallon AIO Frag Tank Kit
This is a purpose-built frag system designed for shallow grow-out. The integrated rear filtration keeps the footprint compact while leaving most of the display open for racks. It is a straightforward platform that scales well with better lighting and dosing as your coral load increases.
Why it helps: The shallow layout with rear chambers keeps water level steady around frags, supports predictable flow patterns, and simplifies nutrient control with media baskets and a skimmer chamber option.
Best for: Hobbyists who want a clean AIO frag station without chasing plumbing parts. Ideal as a main grow-out or as a dedicated SPS or LPS line.
Standout details: Low-iron glass panels for clear viewing of polyp extension, adjustable baffles in the back for tuning water level, and a return section that accommodates common pumps and UV inlines.
Potential downsides: Rear-chamber AIO tanks limit total equipment size compared to a sump. If you plan heavy nutrient export or big refugia, you might outgrow the rear bay.
Setup tip: Run two small powerheads facing each other to create even laminar flow across racks. Add a mesh lid to prevent jumping fish if you keep a wrasse for pest control.
2) Innovative Marine NUVO Fusion 25 Lagoon AIO
The NUVO Lagoon format is shallow, wide, and built around strong display performance with a simple back-chamber filtration section. It doubles as a display frag tank and a workhorse grow-out. The footprint makes lighting straightforward and keeps PAR uniform from front to back.
Why it helps: The lagoon’s shallow height reduces light waste and makes it simple to achieve 200–350 PAR across racks for SPS while keeping edges moderate for LPS and zoas.
Best for: Growers who want a polished, living-room-friendly frag system that still functions as a daily workstation.
Standout details: Polished rimless edges, a quiet back-chamber layout that accepts media caddies and a compact skimmer, and included return nozzles that help with surface turnover.
Potential downsides: Premium build comes at a higher price. Limited rear-chamber volume compared to a sump means you should plan dosing and ATO early to maintain stability.
Setup tip: Center a single high-quality LED with a wide lens or run two smaller LEDs offset to remove center hotspots. Keep racks low and spread, then stagger coral height by plug stems for even growth.
3) Landen Shallow Rimless Low-Iron Aquarium (60S class)
Landen’s shallow low-iron tanks are reliable, minimal, and affordable for a custom frag build. They arrive with clear silicone and a leveling mat, giving you a clean canvas for your choice of overflow, sump, or AIO insert. If you enjoy tailoring gear to your process, this path is flexible and cost-effective.
Why it helps: The shallow rimless format and low-iron clarity make coral inspection simple. You control the filtration scale by adding an external overflow and sump sized for your bioload.
Best for: DIY reefers who want maximum control over lighting, plumbing, and nutrient export. Perfect if you plan to expand racks and volume over time.
Standout details: High-clarity panels, true edges for seamless viewing, and standard dimensions that match many third-party stands, lids, and overflow boxes.
Potential downsides: No built-in filtration. You must supply overflow, return, and all filtration hardware. Upfront planning takes longer, but the result is scalable.
Setup tip: Pair with a low-profile external overflow and a quiet DC return. Use a 10–20 gallon sump with a skimmer, filter roller or socks, and a dosing manifold. Keep return flow gentle and let powerheads handle the main circulation.
4) Fluval Sea Evo 13.5
For tight spaces or a starter frag station, the Evo 13.5 is compact and proven. It is not a high-volume grow-out tank, but it is a practical way to stage frags, quarantine new cuts, or isolate a single coral line. With a simple upgrade path, it can support softies and LPS well and some SPS with careful tuning.
Why it helps: Small water volume warms up fast, is easy to maintain, and fits on a desk or rack shelf. It is also an ideal pest-control quarantine before frags enter your main grow-out.
Best for: Beginners, small-scale projects, or a dedicated quarantine frag tank to keep pests out of the main system.
Standout details: Rear-chamber design, a stock light that works for softies and many LPS, and a compact footprint that is easy to service.
Potential downsides: Limited space and light output. For SPS or dense LPS loads, upgrade the light, add a stronger return pump, and increase flow with a nano powerhead.
Setup tip: Keep rockwork minimal. Run a small media basket with carbon and phosphate media. Swap the stock nozzle for a wider outlet and add one nano wavemaker to even out hotspots.
How to size your frag system
Footprint first: Prioritize length and front-to-back depth over height. This gives you room for staggered racks and consistent light at low mounting heights.
Water volume: More volume gives more stability. A 20–30 gallon AIO is a sweet spot for most homes. If you need faster turnover and heavy cutting, consider 40 gallons or add a sump.
Growth plans: Map how many plugs you intend to run in 6 months. Plan 25–40 percent extra rack space for spacing and upgrades.
Lighting targets for fast, healthy growth
Uniform PAR is more important than peak PAR. Avoid spikes that bleach tips and valleys that starve bases.
PAR guidelines:
SPS: 200–350 PAR over most of the rack area
LPS: 80–180 PAR, with moderate flow
Softies and zoas: 60–120 PAR, lower turbulence
Practical tip: Raise your light slightly and widen the spread to reduce hotspots. Mount racks lower than center and pull high-demand frags closer to the light in stages over 1–2 weeks.
Flow that prevents shading and detritus buildup
Corals want stable, oxygen-rich water with regular, not chaotic, movement around tissue. In shallow frag tanks, even flow beats brute force.
Baseline: Two small opposing powerheads or a single gyre across the rack plane. Aim across the rack, not at it.
Signs of correct flow: Flesh moves gently, no film on plugs, no piles of detritus under racks, and no sandstorms.
Adjustments: Increase flow when polyps are extended but tips look dusty or when film algae collects on plugs. Reduce flow if tissue recession appears at edges or LPS inflate excessively.
Filtration and nutrient control
Consistent nutrients support color and growth. Avoid swings from aggressive export or overfeeding.
Core approach: Mechanical filtration in the rear chamber or sump, a skimmer sized to the bio-load, and light chemical media for phosphate and organics. Keep refugiums compact and stable if used.
Nutrient targets: Nitrate 2–10 ppm, phosphate 0.02–0.1 ppm. Do not chase zero. Corals need a touch of nutrients for color and growth.
Maintenance rhythm: 10–15 percent water changes weekly or biweekly. Rinse or change media regularly, and clean pump intakes to keep turnover consistent.
Stability and dosing
Corals consume alkalinity, calcium, and magnesium steadily as they calcify. Stability is more important than any single number.
Parameter targets: Alkalinity 8–9 dKH, calcium 420–450 ppm, magnesium 1300–1400 ppm, salinity 1.025–1.026, temperature 77–78°F.
Upgrade path: Start with water changes. When daily alk drops more than 0.3 dKH, add two-part dosing or a kalkwasser plan. An ATO with a reliable sensor prevents salinity swings that slow growth.
Pest control and quarantine
Frag tanks see frequent new coral introductions. Preventing pests protects your time and livestock.
Process: Dip all new frags. Inspect plugs for eggs and aiptasia. If possible, stage new frags in a small dedicated frag tank like the Evo 13.5 for 2–4 weeks before moving them into the main grow-out.
Tools: Quality coral dip, dedicated tweezers and scalpel, magnifier, super glue gel, spare plugs, and a small rack just for quarantine. Keep pest-control gear separate from your main tools.
Rack strategy and frag handling
Racks control light, flow, and access. A good rack plan avoids wasted space and keeps plugs easy to remove for trimming or shipping.
Layout: Low, spread-out racks in zones. Place SPS up high with clean laminar flow, LPS mid levels with indirect flow, and softies on the edges. Keep 1–2 plug holes free between colonies to prevent warfare.
Handling: Cut with clean tools. Use fresh blades. Glue frags to clean plugs, and let them set in a low-flow corner for 10–20 minutes before moving them to the final rack spot.
How these four picks cover different needs
Fiji Cube 22 AIO Frag streamlines setup, keeps maintenance low, and gets you growing quickly. It balances space, stability, and ease of use, which is ideal for most homes.
Innovative Marine 25 Lagoon adds a premium finish and a display-grade look while staying practical. Choose it if you want a quiet, polished system that still grows frags fast.
Landen Shallow Rimless is the DIY choice with the best long-term flexibility. If you want to scale filtration and lighting beyond AIO limits, start here.
Fluval Evo 13.5 fills the small-space and quarantine role. It is a smart second system to protect your main grow-out from pests and surprises.
Conclusion
Successful frag tanks focus on stability, even light, and clean flow in a shallow footprint. Each pick here covers a common path. Start simple with an AIO, go modular with a rimless and sump if you want full control, or run a compact quarantine alongside your main grow-out. Dial in PAR and flow, lock nutrients into a stable range, and keep a strict dip and inspection routine. That is how you get healthy cuts, fast healing, and consistent color month after month.
FAQ
Q: What size frag tank is a good starting point for beginners?
A: A 20–30 gallon AIO is a sweet spot for most homes because it balances stability with easy maintenance and a compact footprint.
Q: What PAR should I target for different coral types in a frag tank?
A: Aim for 200–350 PAR for SPS, 80–180 PAR for LPS, and 60–120 PAR for softies and zoas, with uniform coverage and minimal hotspots.
Q: Do I need a sump for a frag tank?
A: No. AIO rear-chamber tanks work well and keep things simple. A sump adds volume and flexibility, which is best if you want heavy nutrient export or plan to scale up.
Q: How should I set up flow in a shallow frag tank?
A: Use two small opposing powerheads or a single gyre across the rack plane to create even laminar flow, avoid dead spots, and prevent detritus buildup.
Q: How can I keep pests out of my frag system?
A: Dip all new frags, inspect plugs for eggs and aiptasia, and if possible quarantine new frags in a small dedicated system for 2–4 weeks before moving them into the main grow-out.