We are reader supported. When you purchase through links on our site, we may earn an affiliate commission. Also, as an Amazon affiliate, we earn from qualifying purchases.
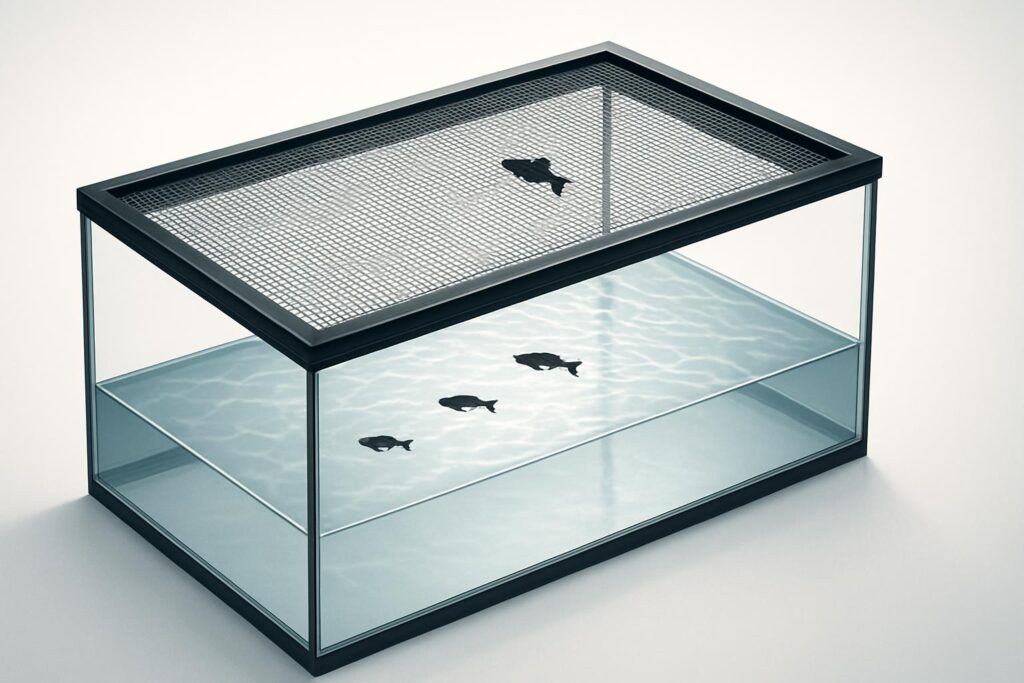
Fish jump. Gobies, wrasses, killifish, rainbowfish, even community favorites like hatchetfish or guppies can launch themselves through the smallest gap. A tight mesh lid stops escape attempts while keeping gas exchange strong and light transmission high. If you care about oxygenation, stable temperature, and coral or plant health, a mesh cover beats a solid glass canopy in most home systems. This guide walks you through what to look for, how to size a cover correctly, and the 4 best aquarium mesh lid kits that balance fit, durability, and clean presentation.
What Makes a Great Aquarium Mesh Lid Kit
Secure fit without blocking equipment
A good kit frames snugly to your tank footprint while allowing clean cutouts for power cords, HOB filters, hang-on skimmers, auto-feeders, and light mounts. The result should be gap free with smart reliefs where gear enters and exits.
Strong, corrosion resistant materials
Aluminum rails resist salt creep and humidity better than thin plastics. Marine grade hardware and UV stable netting hold tension longer and avoid yellowing. Look for robust corner connectors and a reliable spline that locks the mesh without slipping.
Right mesh size for your fish
Most jumpers cannot pass through 1 by 4 inch netting. For nano species like small gobies or juvenile wrasses, 1 by 8 inch netting adds security. Oversized 1 by 2 inch mesh is risky for small species and not recommended for mixed reef or community tanks with tiny fish or shrimp.
Minimal light loss and heat trapping
Clear or black monofilament nets usually reduce PAR by only a few percent, compared to much higher losses under glass with condensation and mineral films. A low profile, open mesh avoids heat buildup and maintains surface agitation.
Simple assembly and clean look
Pre cut or easy to cut rails, included spline, and a net that tensions smoothly matter for a flat, professional finish. A sleek profile improves viewing and reduces visual clutter around rimless displays.
How to Choose the Right Size and Mesh
Measure the inside lip, not just the outer glass
Rimmed tanks often need a cover that sits on the inner lip to prevent sliding. Measure the inside length and width, then subtract a few millimeters for clearance. Rimless tanks can use either a sit on top frame or a slightly inset design, depending on the kit.
Match mesh size to livestock
Use 1 by 4 inch mesh for most marine and freshwater jumpers. Choose 1 by 8 inch mesh for very small species or fry grow-outs. Err on the smaller side if you keep darting, pencil thin fish. Smaller mesh slightly reduces light but greatly improves containment.
Plan for equipment cutouts from the start
Sketch where filters, pipes, powerheads, cords, and light legs will sit. Most kits include ways to create cutouts or notches. A careful plan yields a cleaner perimeter with fewer last minute adjustments.
4 Best Aquarium Mesh Lid Kits to Prevent Jumping Fish
1. Red Sea DIY Aquarium Net Cover — Best Overall
Red Sea’s DIY net cover is the most balanced solution for mixed reef and planted tanks. The low profile aluminum frame is rigid without looking bulky. The corners, joins, and spline are well sorted, so the net tensions flat and stays that way. Included mesh is sized right for most jumpers, and the kit supports neat cutouts for cords and hang-on gear. It is available in multiple base sizes, and the rails are easy to cut for a custom footprint.
Why it helps: The frame sits close to the glass for a clean line, and the mesh blocks jumpers while allowing excellent gas exchange and light penetration. Aluminum rails resist warping in humid, salty environments.
Best for: Reef tanks with active wrasses or gobies, planted tanks with hatchetfish or rainbowfish, and any display where you want a refined look without heavy shadows.
Standout details: Secure corners reduce flex, the spline holds consistently, and the finish blends into rimless setups. Light loss is minimal, which is ideal for high-light corals and carpeting plants. The kit supports center braces on longer spans to prevent sagging over time.
Potential downsides: Assembly requires careful measuring and miter cuts. If you need many large cutouts, plan the frame segments to maintain rigidity. The included mesh color can be more visible than ultra-clear options depending on your lighting.
Build tips: Dry fit all corners before committing. Use a spline roller for even tension. Add a middle brace for lengths over 36 inches. If you run a bulky HOB skimmer, practice the cutout on a scrap rail first.
2. D-D Jumpguard Pro DIY Aquarium Cover — Lowest Profile for Display Tanks
The D-D Jumpguard Pro is a favorite in sleek reef systems that demand a near invisible edge. The frame has a low, narrow profile that hugs the top pane, and the components are precise. The mesh is fine enough to stop typical jumpers while remaining unobtrusive from normal viewing distances. The kit includes practical parts for corners and notches, and the result is a tight, flat cover that looks purpose built.
Why it helps: The ultra low profile minimizes visual distraction along the tank rim and keeps light shadows to a minimum. Tensioned properly, the screen remains flat across long spans with less need for heavy center bracing.
Best for: Rimless reef displays in living rooms or offices where aesthetics rank high, mixed reefs with active wrasses, and shallow frag tanks where light evenness matters.
Standout details: Clean aluminum extrusions, corner strength, and predictable cuts make it easier to achieve a custom fit. The mesh feels robust yet light. Once dialed in, it becomes a set-and-forget solution that resists bowing.
Potential downsides: Metric framing lengths can be slightly different from common US rim sizes, so double check measurements. Precise cuts are important because the minimal profile leaves little room for sloppy joints.
Build tips: Use a fine tooth hacksaw or miter saw with a non-ferrous blade. Test-fit over the tank before netting. Mark and cut equipment reliefs early so the net can be tensioned evenly around them.
3. Innovative Marine DIY Mesh Screen Lid Kit — Best Plug and Play for NUVO and Rimless Tanks
Innovative Marine offers DIY screen kits that pair naturally with NUVO series aquariums and many other rimless tanks. The extrusions are sized to sit cleanly on the glass, and the parts list is curated for hobbyists who want a reliable lid without tracking down extra hardware. The mesh is appropriately sized for reef jumpers and most freshwater community fish. The look matches modern rimless systems without the bulk of glass canopies.
Why it helps: Kits are optimized for typical rimless footprints, so fewer compromises are needed to make a cover that disappears at a glance. The screen breathes well, protecting fish while keeping pH and oxygen stable.
Best for: NUVO owners, freshwater rimless tanks with open top aesthetics, and reef keepers who want a tuned kit that needs less trial and error.
Standout details: The aluminum is consistent and the corner pieces seat firmly. Clear instructions and dependable spline make it easier for first-time builders to achieve even tension across the net. Many users can assemble a tidy lid in a single session.
Potential downsides: Tank-specific kits may not be an exact fit for non-IM aquariums, especially if you have unusual glass thickness or equipment that demands larger cutouts. For very large tanks, you may need to add a secondary brace.
Build tips: Measure glass thickness and outside dimensions twice. If your light mounts or skimmer hangers are wide, plan to split the frame into two panels or include a more generous cutout with reinforcement on either side.
4. NICREW DIY Aquarium Net Cover Kit — Best Budget Pick
NICREW’s DIY net cover kit is an affordable way to protect your fish without sacrificing airflow or light. The kit includes aluminum rails, plastic corners, spline, and fine mesh that will stop common jumpers. It is a practical solution for new hobbyists, quarantine systems, or multi-tank rooms where you need several lids without a high spend.
Why it helps: You get the core parts needed to assemble a flat, secure cover. The mesh size suits mixed community tanks and reef setups with typical jumpers. With careful assembly, the end result is clean and functional.
Best for: Budget builds, backup or quarantine tanks, breeders who need multiple covers, and freshwater communities where appearance matters but cost control is key.
Standout details: Straightforward assembly, widely compatible rails, and decent mesh out of the box. The kit supports simple notches for cords and HOB filters with basic tools.
Potential downsides: The corners and connectors are not as premium as higher priced kits, and very long spans can benefit from an added brace to prevent sagging. Precision of the cuts matters more to achieve a tight, square fit.
Build tips: Use a spline roller and tension the mesh gradually on opposite sides to avoid wrinkles. For tanks over 30 inches in length, add a center support to keep the net taut long term.
Step by Step Assembly Guide
1. Plan your layout
Identify every obstacle around the rim: filter intakes, return pipes, skimmer hangers, power cords, light legs. Sketch where reliefs or cutouts will go. A few minutes of planning saves multiple recuts.
2. Measure twice, cut once
Measure the inside lip for rimmed tanks or the outside edge for rimless. Subtract a few millimeters to avoid binding. Transfer measurements to the rails using a square and mark mitered corners where required.
3. Dry fit the frame
Assemble corners without the mesh to confirm a snug, wobble free rectangle or square. If the frame rocks on the glass, recheck diagonals for squareness and adjust.
4. Add notches and reliefs
Cut small sections out of the rail where equipment needs to pass. Reinforce long reliefs by leaving short rail stubs or using additional corner connectors as supports. Keep gaps as tight as practical.
5. Install the mesh and spline
Lay the mesh over the frame with a small overhang on all sides. Press the spline into the channel starting from the center of one side, then the opposite side, and finish with the remaining two sides. Use a spline roller for even pressure. Work slowly to avoid wrinkles.
6. Trim excess mesh and test fit
Use a sharp blade to trim mesh flush with the outer channel. Place the frame on the tank. Confirm that the net is taut and flat. If you see sagging, remove and tighten the spline in that section or add a center brace.
Common Mistakes and How to Avoid Them
Using the wrong mesh size
Large mesh may pass small fish. For mixed or nano systems, default to 1 by 4 inch or smaller. If you keep pencil-thin species, use 1 by 8 inch.
Skipping a center brace on long spans
Over 30 to 36 inches, a simple brace keeps screens tight over time, especially in humid saltwater environments where slight stretch can occur.
Ignoring salt creep and cleaning
Rinse the screen and frame during water changes. Salt creep and mineral film build up reduces light and can eventually stain cheaper plastics.
Leaving wide cord gaps
Large cutouts defeat the purpose. Keep cord reliefs minimal and shaped to the cable. Tighten tension around these areas so fish cannot find a launch gap.
Maintenance and Longevity Tips
Rinse and inspect monthly
During routine maintenance, remove the lid and rinse with freshwater. Check spline tension, corners, and braces. Look for any mesh fray near cutouts and replace as needed.
Protect the frame during cleaning
Set the frame on a towel or soft surface when off the tank to prevent scratches. Avoid leaning heavy lights or lids on one edge for long periods.
Plan for mesh replacement every few years
UV stable mesh lasts, but replacing it periodically ensures clarity and strength. Spline channels can be reused if kept clean and undamaged.
Which Kit Should You Pick
Choose by tank type and priorities
If you want the most polished all rounder with solid components and easy support for cutouts, pick the Red Sea DIY Aquarium Net Cover. If your priority is an ultra low profile that blends into a designer reef, the D-D Jumpguard Pro is the most discreet. For rimless NUVO systems or hobbyists who want a tuned experience with fewer adjustments, Innovative Marine’s kit is a strong match. If you need an economical solution for multiple tanks or a starter build, NICREW offers great value with the features that matter.
Match the mesh to your fish
Active jumpers and nano species deserve 1 by 4 inch mesh or smaller. For heavily stocked nano reefs and fry rearing, go finer. When in doubt, choose the smaller mesh size and add a center brace to maintain light spread and tautness.
Conclusion
Preventing jumpers is simple when you combine a precise frame, tight mesh, and thoughtful cutouts. Mesh lids protect fish while preserving gas exchange and light, and they avoid the heat and condensation problems found with solid covers. The four kits above cover every scenario from premium display to budget multi-tank setups. Measure carefully, plan your reliefs, tension the net evenly, and add a center brace on longer spans. You will get a flat, secure lid that looks clean, keeps fish safe, and maintains the performance your corals or plants need.
FAQ
Q: What mesh size should I use for most jumpers
A: Use 1 by 4 inch mesh for most marine and freshwater jumpers. Choose 1 by 8 inch mesh for very small species or fry.
Q: Why choose a mesh lid over a glass canopy
A: Mesh maintains gas exchange and minimizes light loss and heat buildup, while a solid glass canopy often traps heat and reduces light due to condensation and mineral films.
Q: Do I need a center brace on longer tanks
A: Yes, for spans over 30 to 36 inches, a center brace keeps the screen taut and prevents sagging over time.
Q: Which kit is best for a sleek rimless reef display
A: The D-D Jumpguard Pro is the lowest profile option and blends cleanly with rimless displays.
Q: What are common mistakes when building a mesh lid
A: Using mesh that is too large, skipping a center brace on long spans, ignoring salt creep cleaning, and leaving wide gaps for cords are the most common mistakes.