We are reader supported. When you purchase through links on our site, we may earn an affiliate commission. Also, as an Amazon affiliate, we earn from qualifying purchases.
Salinity stability drives coral health. Evaporation pushes salinity up every hour, and manual top-offs slip, especially on busy days. An auto top-off system keeps your reef tank stable by replacing evaporated water with fresh RO/DI automatically. The right ATO reduces work, prevents salinity swings, and acts as a safety net against overfills. Below you will find clear criteria, then four proven ATO systems that cover different budgets and setups, followed by setup and maintenance tips to avoid common mistakes.
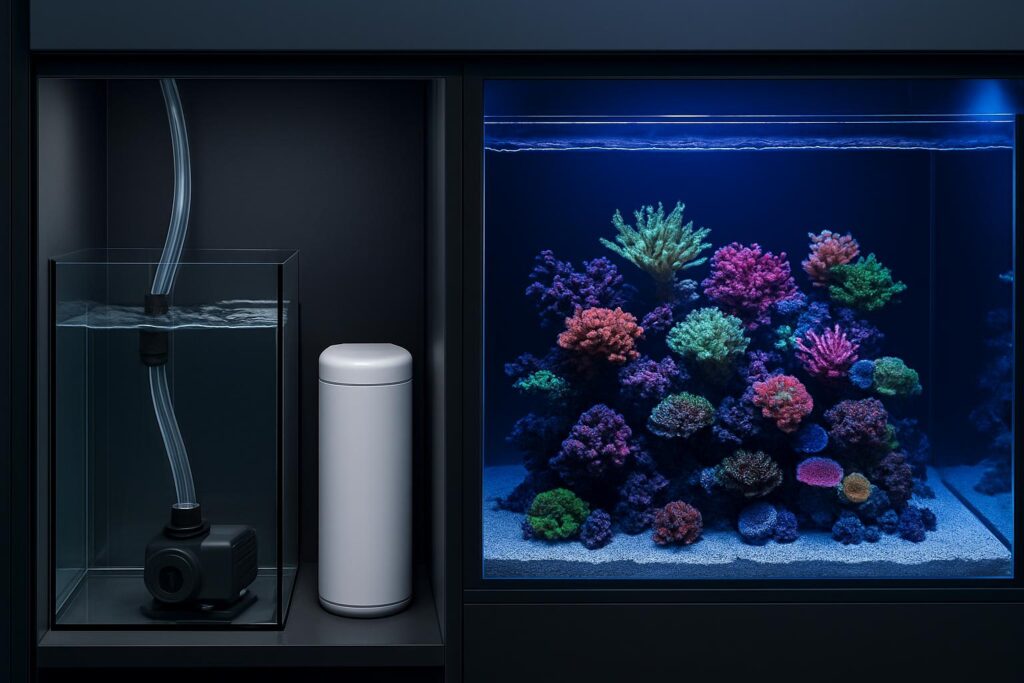
What Matters Most in a Reef-Safe ATO
Sensor reliability and redundancy
Optical sensors are precise and have no moving parts. Mechanical float switches are simple and reliable as a backup. The safest systems use a primary optical sensor plus a separate backup sensor or float, and a time-out alarm in the controller.
Safety features that actually protect your reef
Look for independent backup sensors, a controller time-out, and an audible alarm. Extra points for physical failsafes, like a mechanical float that stops water flow if the controller fails.
Pump quality and head height
The included pump should be quiet, handle expected head height from your reservoir to your sump, and deliver a gentle trickle. Too much flow causes frequent overshoot and TDS creep. Too little flow causes long top-off times that can trigger alarms.
Mounting, footprint, and cable management
Magnets make positioning sensors easy and secure. A small footprint helps in tight sumps. Clean cable routing matters in humid cabinets and reduces accidental tugs or salt creep on connectors.
Noise, microbubbles, and daily behavior
Short, quiet top-offs are ideal. Optical sensors can false-trigger if microbubbles cover the sensor face. Place sensors in a calm section and keep surfaces clean.
The 4 Best Aquarium Auto Top Off Systems for Reef Tanks
1) Tunze Osmolator 3155 — Consistent, proven reliability
Tunze built the reputation for ATO reliability by pairing stable sensors with a conservative control algorithm. The Osmolator 3155 uses a primary optical sensor and a dedicated mechanical float switch as a physical high-level safety. It includes a quiet low-voltage pump, robust magnet mounts, tubing, and a controller with audible alarms and time-out protection.
Key strengths
The primary optical sensor gives precise top-offs in short, gentle bursts, limiting swings. The backup float switch sits above and kills power if the water hits a high level. The controller’s time-out and alarm add another layer of protection. The included pump and tubing are sized for common cabinet setups and produce smooth fills.
Setup and daily use
Mount the optical sensor in the return chamber where water level fluctuates. Position the float switch a bit higher as backup. Place the pump in your RO/DI reservoir, run the tubing to the sump, and set the outlet above the high-water line to prevent back-siphon. After initial calibration, the system runs hands-off. Keep sensor faces clean and salt-creep free.
Why it helps: Stable salinity, multiple independent safety layers, and predictable top-off behavior prevent coral stress and protect against overfill.
Best for: Reefers who want a long-term workhorse with redundant safeguards in small to large sump systems.
Potential downsides: Higher price than minimalist units. The mounts and controller are a bit bulkier than ultra-compact ATOs. As with all optical sensors, microbubbles near the sensor face can cause nuisance alarms if placement is poor.
Pro tip: Mount the optical sensor away from return nozzles or skimmer outputs and clean the sensor face during routine maintenance to prevent false readings.
2) Neptune Systems ATK v2 — Deep redundancy and Apex integration
The ATK v2 is built for layered safety and optional control with an Apex aquarium controller. It operates standalone or as part of an Apex system. Two solid-state optical sensors handle normal top-off and high-level monitoring. A physical float provides a passive backup. The kit includes a PMUP pump, tubing, and an FMM module for sensor management.
Layered safety
Two separate optical sensors split duty: one controls top-off, the other serves as high-level protection. A mechanical float adds a physical stop against overfill. The controller logic caps run time to prevent a stuck-on pump. With Apex, you can program custom limits, notifications, and feed modes.
Setup and scalability
Install the primary optical sensor in the calm return chamber, then mount the high-level optical sensor above it. Place the float backup slightly higher. The PMUP sits in your reservoir and delivers quiet, consistent flow. If you own an Apex, add alerts and automation. If not, run the ATK in standalone mode with built-in protections.
Why it helps: Triple layers of protection, clean integration with advanced controllers, and a reliable pump keep salinity tight and risks low.
Best for: Reefers who want maximum redundancy, plan to scale their system, or already run an Apex.
Potential downsides: Higher complexity and more cabling than compact ATOs. Costs more than simple single-sensor units. Requires thoughtful sensor placement to avoid bubble interference.
Pro tip: If your return chamber is very small, set a low pump speed or limit run times through Apex to prevent overshoot from momentum in a tiny volume.
3) XP Aqua Duetto ATO — Slim dual-optical value
The Duetto ATO packs two optical sensors into a single compact body. The lower sensor handles normal top-off, and the upper sensor acts as a high-water cutoff with an audible alarm. Its small controller and included DC pump make it beginner-friendly while offering redundancy missing from single-sensor micros.
Compact and capable
The sensor assembly is thin, easy to place in cramped sumps, and secured by a magnet mount. The pump is sized for small to medium tanks and provides steady, quiet flow. The alarm is loud enough to warn of a problem if the high sensor triggers.
Setup flow
Mount the sensor where water level is stable and clean. Place the lower eye at your desired operating level and ensure the upper eye is above it with line of sight. Keep the sensor face free of algae and salt creep. Set the pump in the reservoir, secure tubing to avoid kinks, and route the outlet above the sump waterline.
Why it helps: Dual optical sensors add safety without much bulk or cost, and setup is straightforward.
Best for: Nano to mid-size reef tanks that want redundancy in a compact package.
Potential downsides: Like all optical sensors, microbubbles or films on the sensor can cause false triggers. The included pump is modest; long vertical runs may need a stronger pump.
Pro tip: Wipe the sensor lens during water changes and aim a small baffle or sponge to reduce splashing and bubble contact.
4) AutoAqua Smart ATO Micro — Ultra-compact for nano reefs
The Smart ATO Micro targets tight spaces. It uses a single tiny optical sensor, integrated controller, and a small DC pump. AutoAqua’s protection logic monitors pump run times and behavior to catch anomalies, then sounds an alarm and stops the pump if it detects a risk.
Minimal footprint, quick install
The sensor and controller are combined in a tiny module that mounts with a magnet. The pump sits in your reservoir and connects with included tubing. With very few parts, you can get it running fast in all-in-one tanks and small sumps.
What to expect day to day
Short top-offs keep salinity stable with little noise. The system prefers clean, calm water around the sensor. If microbubbles or salt film cover the lens, the controller can alarm and pause to avoid overfilling.
Why it helps: It brings set-and-forget stability to very small reef systems where space is scarce.
Best for: Pico and nano reefs, all-in-one aquariums, and sumps with extremely limited sensor space.
Potential downsides: Single-sensor design means less redundancy than dual-sensor units. The small pump suits short runs; long vertical lifts or remote reservoirs can exceed its capability.
Pro tip: Mount the sensor away from return nozzles and surface skimming. Clean the lens regularly to keep detection accurate.
How to Choose the Right ATO for Your Reef
Match safety to your risk tolerance
If you leave the tank unattended for days, pick a unit with multiple independent safeties like the Tunze Osmolator 3155 or Neptune ATK v2. If you check the tank daily and run a small system, a compact unit like the Duetto or Smart ATO Micro may be enough.
Fit the pump to your reservoir location
Measure the vertical lift and horizontal run from reservoir to sump. If you need to pump water up from a lower cabinet or across rooms, ensure the included pump can handle it, or plan to upgrade the pump if the ATO allows it.
Plan clean sensor placement
Install sensors in the return chamber where evaporation is visible and water level fluctuates. Avoid skimmer outlets, bubble traps, and splashing. Keep a little space above the target level for a high-water backup sensor.
Think about cable paths and service access
Route cables neatly with drip loops. Mount controllers where you can see alarm lights and hear alarms. Leave enough slack to remove the pump for cleaning without pulling cables tight.
ATO Setup Tips That Prevent Problems
Stop back-siphon
Always discharge the top-off line above the surface of your sump water level. Do not submerge the outlet. If the line is submerged, it can siphon water after the pump stops and overfill the tank.
Stabilize the return chamber
A swinging return chamber level causes constant on-off cycles. Adjust your overflow and refugium baffles so only the return chamber changes with evaporation. This keeps the sensor behavior predictable.
Start with conservative controller settings
If your ATO lets you set max run times or sensitivity, begin conservatively. Watch several cycles, then fine-tune if needed. Short, frequent doses usually outperform longer, infrequent fills.
Use a covered reservoir
Cover your RO/DI reservoir to reduce contamination and evaporation within the reservoir itself. Keep the pump off the bottom to avoid pulling in any sediment.
Maintenance Schedule for Reliability
Every 2–4 weeks
Wipe optical sensors with a soft cloth to remove biofilm, algae, and salt creep. Check that magnet mounts are tight. Inspect tubing for kinks and salt crust at the outlet.
Every 1–3 months
Remove the ATO pump and soak it in warm water with a little white vinegar to dissolve calcium deposits. Rinse and reassemble. Inspect the impeller for wear. Test the high-level sensor or float by lifting it briefly and confirming the alarm sounds and the pump stops.
Any time you re-scape or move equipment
Recheck sensor heights and clearances. Make sure nothing blocks or shades the optical eyes and that splashing is still minimal.
Right-Sizing Your Reservoir
Estimate daily evaporation and multiply
Track how much RO/DI your tank loses in 24 hours. Multiply by the number of days you want between refills. For an average reef, a 3–7 day buffer is practical. Larger is not always better if placement raises risk of a major overfill. Balance convenience with safety.
Keep salinity stable during refills
Refill the reservoir before it runs dry. Do not let the ATO pump suck air for extended periods. After a refill, confirm the ATO resumes normal short cycles.
Common Mistakes to Avoid
Submerged return line
Do not submerge the top-off outlet. This single error causes many overfill events due to back-siphoning.
Placing sensors in turbulent zones
Optical sensors need a steady surface. Turbulence and microbubbles confuse the reading and produce alarms.
Skipping cleaning
Salt creep and film accumulate faster in reef cabinets. Dirty sensors and pumps are the leading cause of ATO issues.
Oversized, unrestricted gravity feeds
If your system uses gravity assist or a high reservoir, make sure any physical floats or valves are installed and functioning. Unchecked gravity can overwhelm a small sump in minutes.
Which One Should You Pick
Quick recommendations
Best overall reliability: Tunze Osmolator 3155
Maximum redundancy and integration: Neptune Systems ATK v2
Best compact dual-sensor value: XP Aqua Duetto ATO
Best ultra-compact for nanos: AutoAqua Smart ATO Micro
Conclusion
A reliable ATO locks your salinity in place, protects livestock, and reduces daily chores. For reef tanks, prioritize redundant sensors, time-out alarms, clean mounting, and a pump that matches your reservoir distance. If you want a set-and-forget workhorse, the Tunze Osmolator 3155 is a benchmark. If you value deep redundancy and controller integration, the Neptune ATK v2 delivers. For compact redundancy at a fair price, the XP Aqua Duetto works well. For the smallest spaces, the Smart ATO Micro is a strong fit. Place the sensor in calm water, keep the outlet above the waterline, maintain the pump and sensors on schedule, and your reef will hold stable day after day.
FAQ
Q: Do I really need an ATO for a reef tank?
A: Yes, because evaporation raises salinity and stresses corals; an ATO restores freshwater automatically and keeps salinity stable while reducing daily maintenance.
Q: Where should I place the ATO sensor?
A: Place it in the return chamber where water level changes with evaporation, away from skimmer outlets, splashing, and microbubbles.
Q: Which ATO is best for nano tanks with limited space?
A: The AutoAqua Smart ATO Micro is best for pico and nano reefs and very tight sumps due to its ultra-compact sensor and controller.
Q: Which option provides the most redundancy and control?
A: The Neptune Systems ATK v2 offers layered redundancy with dual optical sensors plus a mechanical float, and it integrates with Apex for advanced control.
Q: How often should I clean ATO sensors and pumps?
A: Wipe optical sensors every 2–4 weeks and soak the pump every 1–3 months to remove deposits, then test the high-level safety after reassembly.