We are reader supported. When you purchase through links on our site, we may earn an affiliate commission. Also, as an Amazon affiliate, we earn from qualifying purchases.
CO2 is the most controllable growth lever in a planted aquarium. Get it right and plants pearl, colors pop, and algae stays quiet. Get it wrong and you chase imbalances. A CO2 drop checker is the simplest, most beginner-friendly way to visualize CO2 level through color. In this guide, you will learn how drop checkers work, how to set them up for accurate readings, and the five best options that balance clarity, reliability, and price.
What a CO2 Drop Checker Does
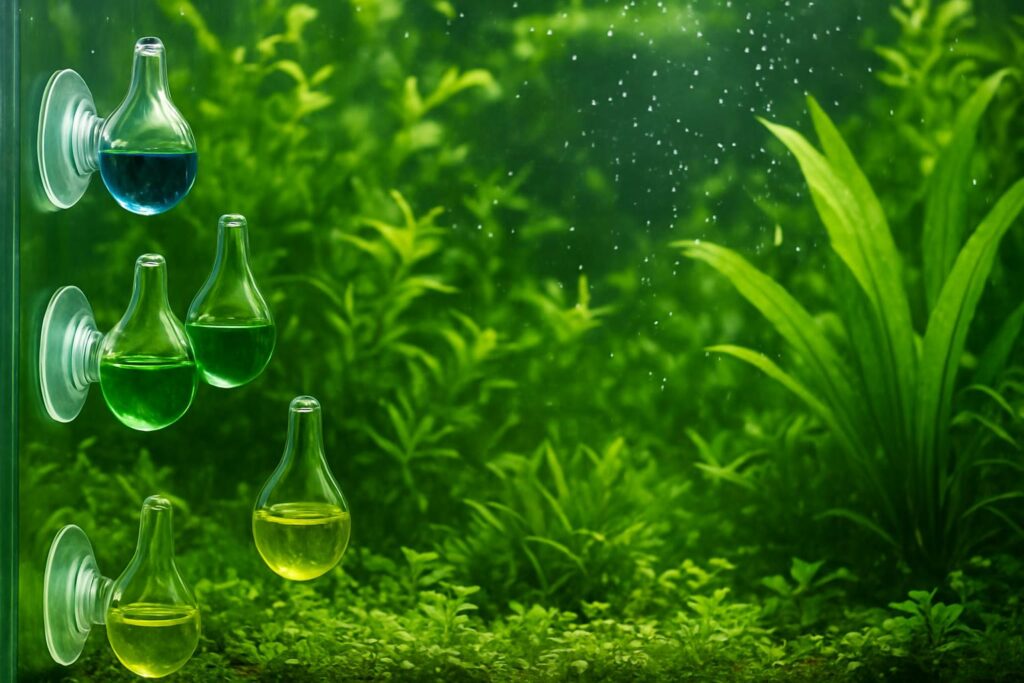
A drop checker holds a small bulb of indicator solution in the tank. CO2 from tank water diffuses into the air gap and then into the solution, changing its pH and color. The color tells you if dissolved CO2 is low, ideal, or high.
– Blue: CO2 too low, plants underfed
– Green: CO2 around the target for growth stability
– Yellow: CO2 too high, risk to livestock
The key to accuracy is using a 4 dKH reference solution with bromothymol blue indicator. This standardized carbonate hardness decouples the reading from your tank’s changing KH so the color accurately reflects CO2 level.
Why You Should Use One
– Continuous visual feedback instead of one-time test strips
– Very low maintenance once set and placed correctly
– Easy to read at a glance without calculations
– Helps fine-tune bubble rate and surface agitation to avoid algae swings
How to Read and Use It Correctly
Color Targets and Timing
– Aim for green during the photoperiod. That aligns with about 30 ppm CO2 for most planted tanks.
– A drop checker responds slowly. Expect 1–2 hours to show changes after you adjust the bubble rate or when CO2 turns on with a solenoid.
– Do not chase shades minute by minute. Tune gradually and watch plants and fish.
Placement Tips for Reliable Readings
– Place it mid-depth or slightly below mid-depth.
– Position it away from the diffuser, usually on the opposite side, to read the average CO2, not the localized peak.
– Keep it in visible flow, not dead spots, to better represent the tank as a whole.
Setup in Simple Steps
1) Fill the checker to the fill line with 4 dKH solution, then add bromothymol blue reagent per the instructions of your kit.
2) Mount it upright with a clean suction cup on the glass.
3) Wait 1–2 hours for the initial color to stabilize.
4) Adjust CO2 slowly over days until the color is consistently green during lights on.
5) Replace solution every 3–4 weeks or when it gets cloudy or contaminated.
How These 5 Were Selected
– Accuracy: Uses or supports the correct 4 dKH reference and stable reagents.
– Readability: Clear, easy-to-see glass shape and sufficient volume for color clarity.
– Build: Reliable suction cups and durable glass or acrylic.
– Ease: Simple filling and maintenance with included or easy-to-source solutions.
– Value: Good performance for the price, with sensible accessories.
5 Best Aquarium CO2 Drop Checkers for Planted Tanks
1) JARDLI Glass CO2 Drop Checker Kit
This is a clear, classic glass checker designed for planted tanks. The brand is known for clean glassware and straightforward kits that include a 4 dKH solution and indicator reagent. The bulb size and clarity make it easy to read from across the room, which matters during daily checks.
Why it helps: The glass build resists staining, the profile is easy to position, and the included reagents keep it simple for beginners and reliable for experienced hobbyists. The solution volume is sufficient for stable color without frequent top-ups.
Best for: New and intermediate aquascapers who want a dependable, easy-to-read glass checker with everything needed in one box.
Potential downsides: Glass requires careful handling during cleaning and installation. Suction cups on any glassware can loosen over time and may need occasional replacement.
Pro tip: Rinse the bulb with distilled water before first use to prevent any residues from affecting the initial color.
2) Fluval CO2 Indicator Kit
Fluval’s kit focuses on accessibility and consistency. The form factor and included indicator solution make setup quick. It is a solid fit for smaller planted tanks and users who appreciate brand-standardized consumables that are easy to find.
Why it helps: Clear instructions and predictable reagents make it beginner friendly. The color transitions are easy to read, and the kit integrates well if you already use other Fluval hardware.
Best for: Hobbyists who want a plug-and-play kit with straightforward replacement solutions and a compact footprint.
Potential downsides: The viewing area is slightly smaller than some glass bulb styles, which may make color reads a bit less obvious from far away on larger tanks.
Pro tip: Place it in moderate flow rather than high flow to reduce microbubbles sticking to the dome, which can distort readings.
3) ISTA CO2 Indicator Set
ISTA offers a glass drop checker with a smooth, easy-to-mount profile and a reagent kit designed for clarity and stability. The glass thickness strikes a good balance between durability and optical clarity. Many aquarists find the solution and color changes highly readable under standard aquarium lighting.
Why it helps: The large viewing window and proven reagent pairing make day-to-day monitoring simple. It is a reliable step up from generic no-name bulbs.
Best for: Aquarists who want a sturdy, readable glass checker for mid-size to large planted aquariums.
Potential downsides: As with most glass units, careful shipping and handling are important. Make sure the suction cup and mount are seated firmly to avoid slips when cleaning glass.
Pro tip: Angle the bulb slightly downward to discourage bubbles from collecting in the checker cavity.
4) NilocG Aquatics CO2 Drop Checker Kit
NilocG focuses on reliable, hobbyist-grade liquids. The kit typically includes the correct 4 dKH reference and indicator reagent, helping avoid the most common beginner mistake of using tank water. The checker itself is simple and effective, with easy refilling.
Why it helps: The pre-mixed reference solution removes guesswork and yields dependable green-blue-yellow transitions aligned with practical CO2 targets.
Best for: Planted tank keepers who value consistent liquid quality for accurate readings and want an all-in-one starter kit from a specialized aquatics brand.
Potential downsides: The design is demure rather than showy. If you want ultra-minimalist glassware aesthetics, consider a high-clarity bulb from brands focused purely on glass.
Pro tip: Combine with a reliable bubble counter and a solenoid timer. Start CO2 60–90 minutes before lights on, then use the checker to confirm you reach green as lights ramp up.
5) FZONE CO2 Drop Checker Kit
FZONE’s kit caters to planted tank enthusiasts who want clean glass, stable reagents, and thoughtful packaging with spare accessories. Visibility is strong, and the included solutions are tuned for predictable behavior.
Why it helps: Crisp glass clarity and reliable suction help you mount the checker where you need it without fuss. The kit typically includes enough solution for refills across maintenance cycles.
Best for: Aquascapers seeking a polished glass look with solid readability in medium and high light tanks.
Potential downsides: As with other glass kits, handle with care during water changes to avoid knocks from tools or hardscape.
Pro tip: Wipe the exterior bulb with a soft cloth weekly. Dust, water spots, and biofilm on the outside make subtle shade differences harder to see.
Dialing In CO2 with a Drop Checker
Start Conservative, Then Nudge
– Begin with a moderate bubble rate, for example 1 bubble per second on a 20-gallon tank. Observe livestock and plants.
– Over several days, increase slowly until the checker holds a solid green for most of the photoperiod.
– Watch your fish. Rapid gill movement or gasping is a warning to reduce CO2 at once.
Coordinate CO2, Light, and Flow
– Target green shortly after lights come on. This means turning CO2 on 60–120 minutes before the photoperiod starts if you use a solenoid.
– Maintain steady surface movement. A light ripple helps oxygenation while preserving CO2. Too much agitation off-gasses CO2, too little can stress livestock.
When to Check
– Best windows: 2 hours after CO2 starts, mid-photoperiod, and 1 hour before CO2 shuts off.
– Avoid overreacting to brief shifts caused by feeding or maintenance.
Common Mistakes and How to Avoid Them
Using Tank Water Instead of 4 dKH
Do not use tank water inside the checker. Variable KH breaks the color-to-CO2 reference and causes confusing readings.
Placing It Too Close to the Diffuser
This shows a localized high reading and may look falsely green or yellow. Place it on the opposite side in consistent flow for a true average.
Expecting Instant Color Changes
A 1–2 hour lag is normal. Make adjustments gradually and recheck after the lag period.
Dirty Bulb or Cloudy Solution
Residue and tinting obscure color. Rinse with distilled water during refills, and replace the solution every 3–4 weeks or when clarity drops.
Maintenance and Troubleshooting
If It Stays Blue All Day
– Increase bubble rate slightly.
– Improve flow so CO2 distributes across the tank.
– Check for leaks in tubing, regulator, or diffuser.
If It Goes Yellow
– Lower bubble rate.
– Add more surface ripple.
– Reduce the CO2-on lead time before lights, then reassess.
If the Color Barely Changes
– Confirm you used 4 dKH solution and fresh reagent.
– Ensure the bulb is not filled past the recommended line; an overfilled bulb slows gas exchange.
– Reposition to moderate flow.
Buying Guide Quick Checklist
– Uses or includes 4 dKH reference and bromothymol blue.
– Clear, readable glass or well-designed chamber shape.
– Secure mount that stays in place during routine maintenance.
– Refill-friendly opening and stable suction cup.
– Trusted brand with replacement solutions available.
Conclusion
A drop checker is a small tool that makes a big difference. It translates invisible CO2 dynamics into a simple color you can act on. Choose a reliable checker, use proper 4 dKH solution, place it in steady flow away from the diffuser, and allow 1–2 hours for changes to show. Aim for steady green during your photoperiod, tune patiently, and your plants will reward you with healthy growth and stability.
FAQ
Q: How long does a drop checker take to show changes?
A: Expect a 1–2 hour lag after adjustments or when CO2 turns on before the color stabilizes.
Q: What color should I aim for during the photoperiod?
A: Aim for green, which aligns with the common planted tank target around 30 ppm CO2.
Q: Can I fill the drop checker with tank water?
A: No. Use a 4 dKH reference solution with bromothymol blue to keep readings accurate and consistent.
Q: Where should I place the drop checker?
A: Mid-depth, away from the diffuser, in moderate flow so it reads the average CO2 level in the tank.
Q: How often should I replace the indicator solution?
A: Replace it every 3–4 weeks or sooner if it becomes cloudy or contaminated.